Patron Self Registration
Item request has been placed!
×
Item request cannot be made.
×
 Processing Request
Enable Patron Self-Registration
Before patrons can self-register, an administrator will need to enable the self-registration feature from the dashboard. Once the following steps are completed, patrons will see a Register button on the patron login screen.
- Navigate to the Authentication tile (Dashboard > Integrations > Authentication)
- Set primary authentication dropdown to ‘internal’
- Click the Internal Tab.
- Check the box for ‘Enable User Self-Registration’.
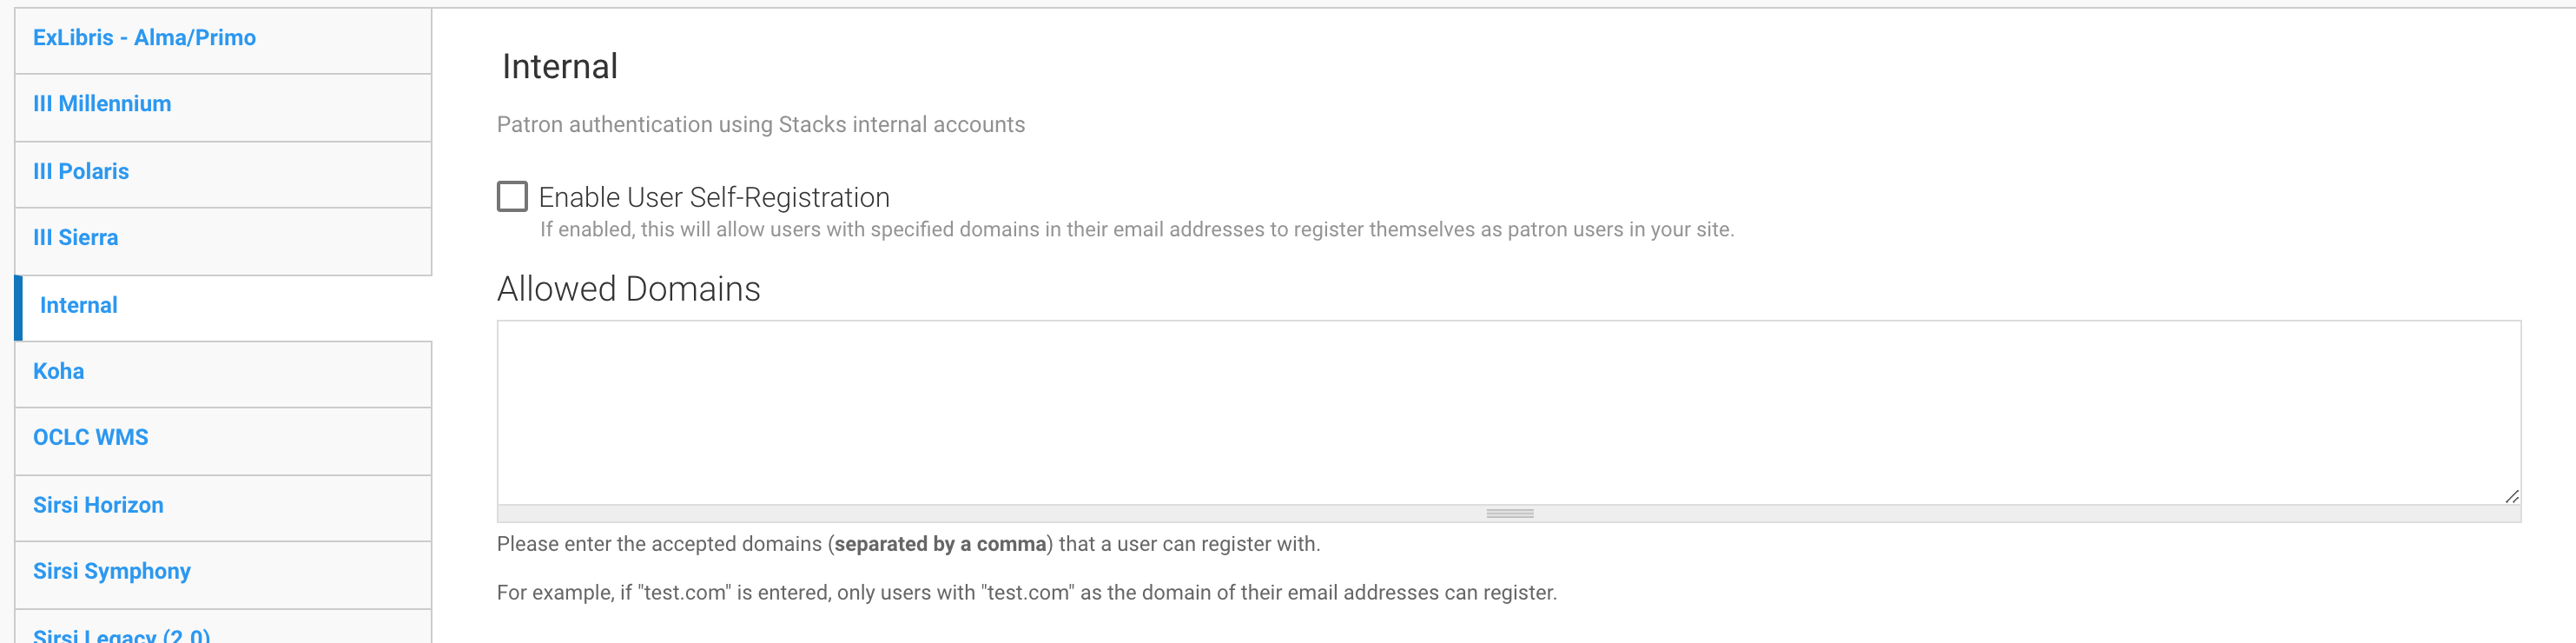
- If you want to restrict registration to specific domains, in the allowed domains field, enter all allowed domains separating each with a comma; or
if you want to allow email addresses from any domain leave the allowed domains field blank.
- Click the SAVE CONFIGURATION button.
Notes Authentication must be set to internal for the Patron Registration section to appear.
Patron Self-Registration Process
Once Patron Self-Registration is enabled on your site, Patrons will be able to create their own account by following these steps:
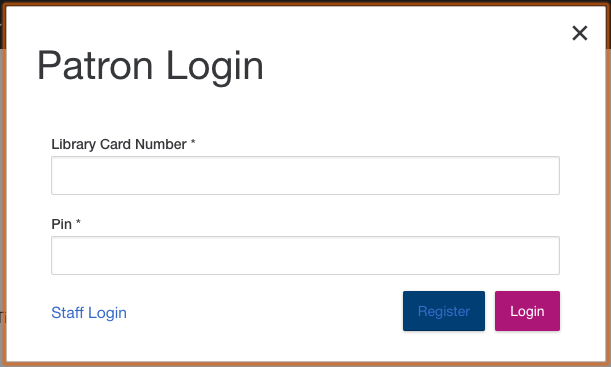
- From the Patron Login Screen click on the Register button.
- Provide a username and email address
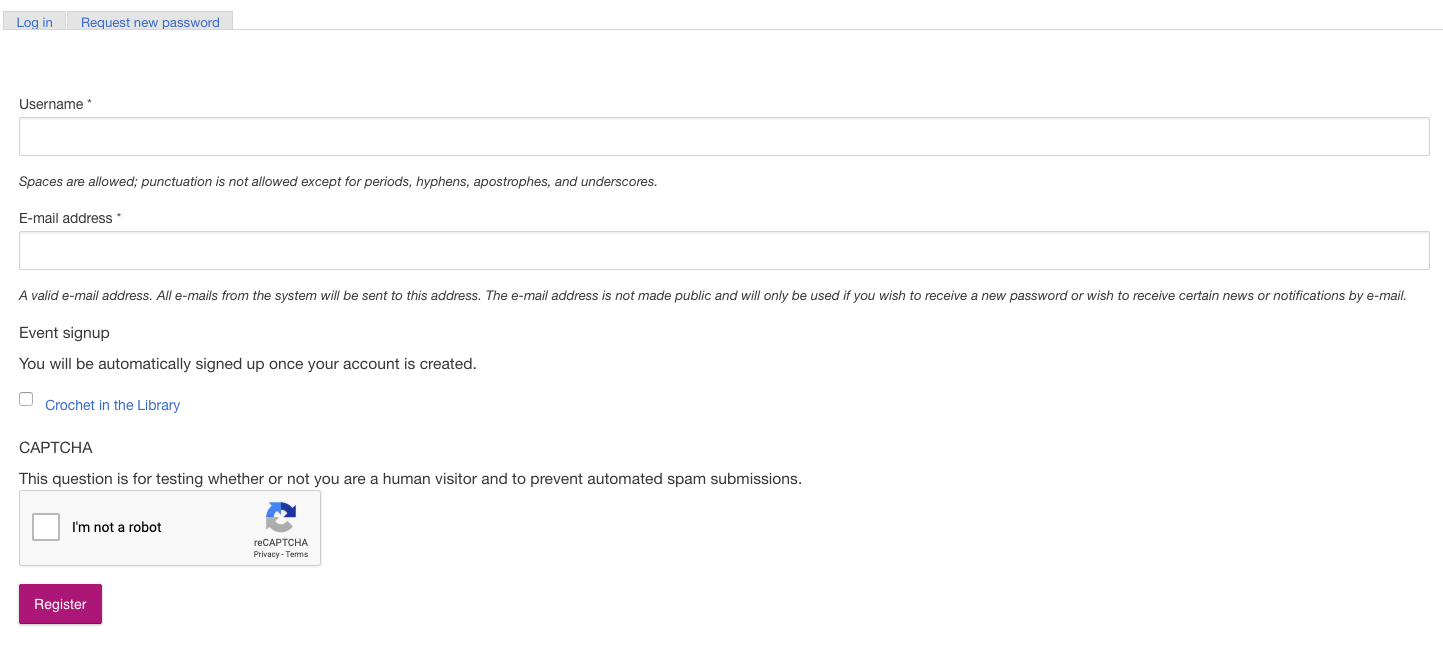
- From the event signup list, select any events you would like to automatically be signed up for once your account is created.
- Click the Register button.
- An Email with further steps will be sent to the Email address you provided, be sure to check your junk or spam folders if you do not see the email in your inbox.
- Click the link provided in the email to log in and complete the account setup.
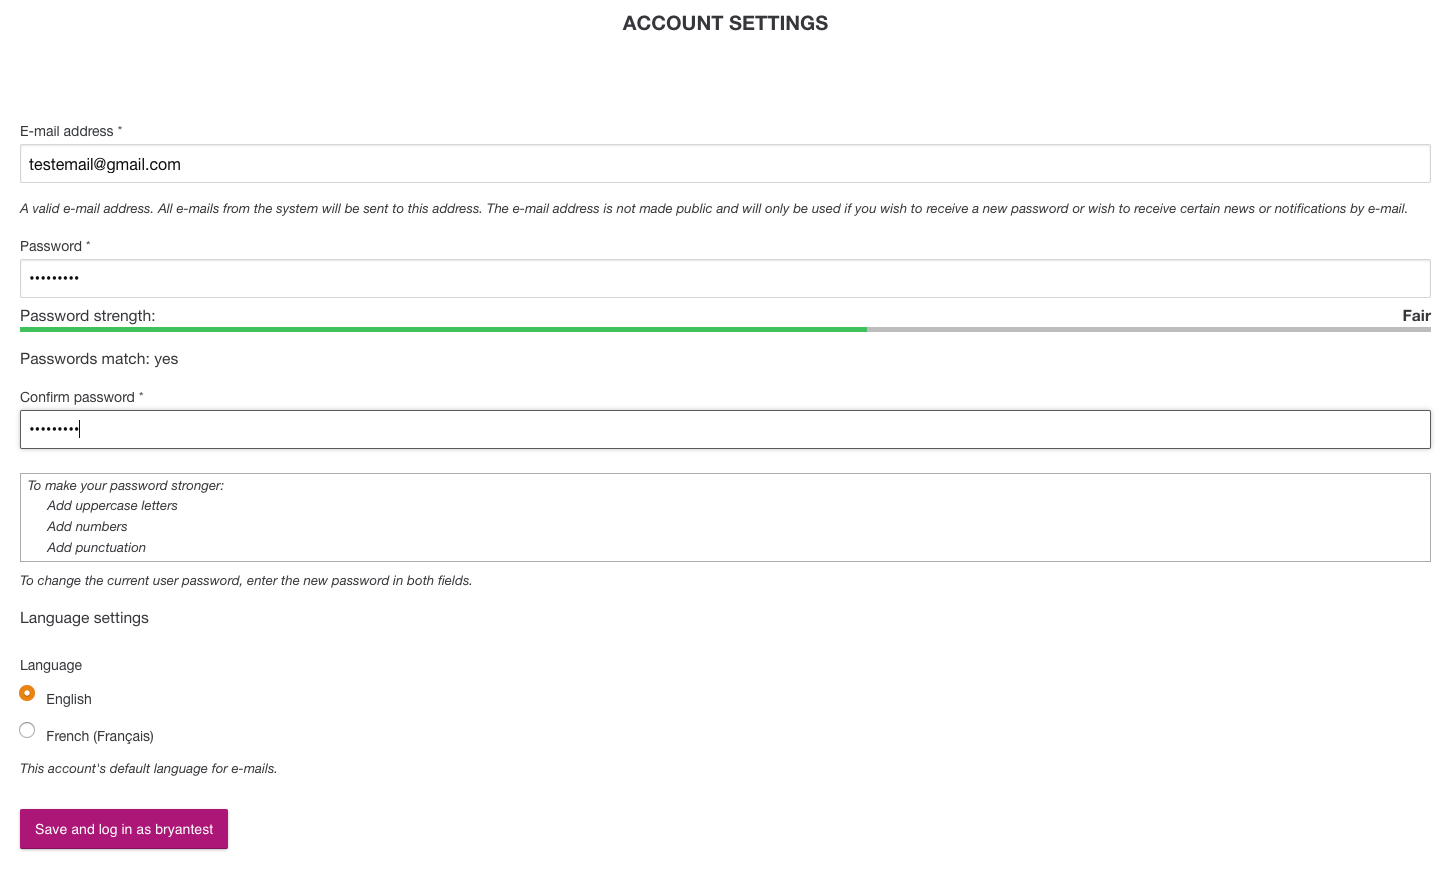
- In the Account Settings page that loads, provide a password and select language preferences.
- Click the Save and log in as [username] button to complete the registration process.