Import Events
 Processing Request
The Events Import feature allows you to perform a bulk import of events by uploading a CSV file that contains event data. To successfully import events with a CSV file we recommend that you include the following information:
- Title
- Start Date
- End Date
- Start Time
- End Time
- Type (must be an exact match to an existing event type filter vocabulary term)
- Category (must be an exact match to an existing event category filter vocabulary term)
- Topic (must be an exact match to an existing event topic filter vocabulary term)
- Location (must be an exact match to an existing location.)
- Description
- External URL
For instructions on creating or modifying filter vocabularies see:
https://info.stacksdiscovery.com/user-manual/filter-vocabularies?qt-guide=1#qt-guide
For instructions on creating or modifying Locations see:
https://info.stacksdiscovery.com/user-manual/location-hours?qt-guide=1#qt-guide
IMPORT EVENTS
Quickly and easily import multiple events into Stacks by uploading a CSV file following the steps below:
- Navigate to the Events Management tile (Dashboard > Events Management).
- Click the IMPORT EVENTS button.

- In the File Upload section, click Choose File to select a CSV file.

- For Multi-Domain environments, you will need to select the domain you want to publish the events to, selecting from All domains or a specific domain.

- In the File Settings section, identify the delimiter used on the CSV file to separate data.

- From the Saved Settings dropdown, select from the import settings used in a previous import (if applicable).

- Click the NEXT button.
- In the Field Match section, identify (or verify) which fields each column should be mapped to.

- Click the IMPORT EVENTS button.
- A Progress Bar will appear indicating the status of the import.

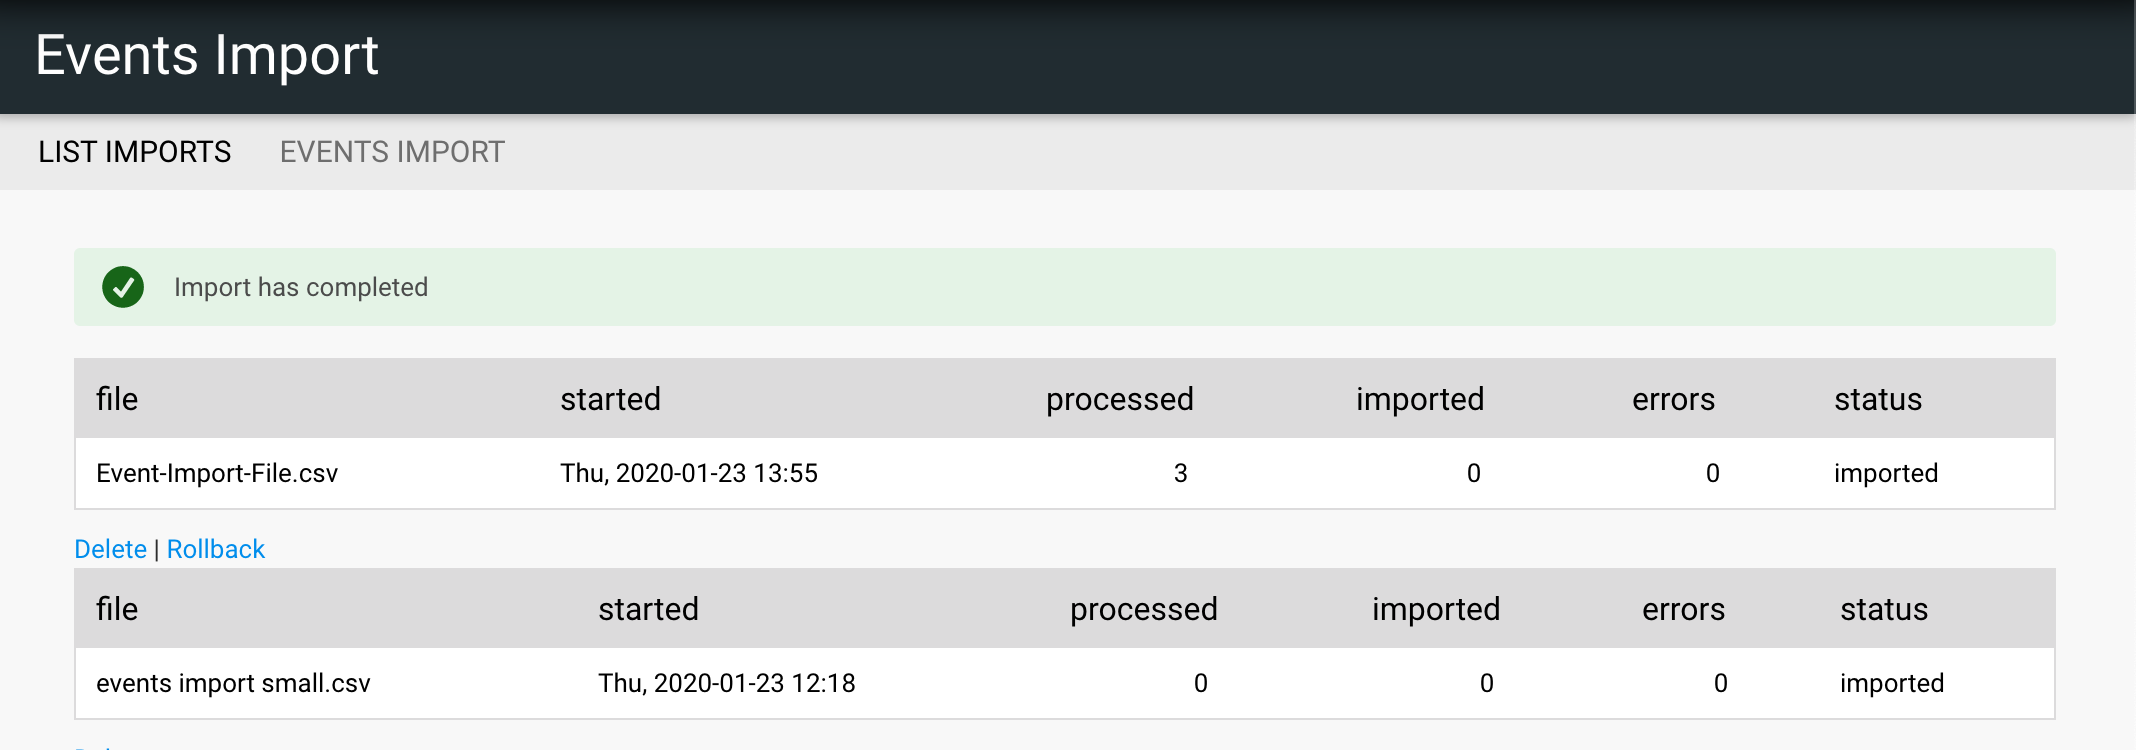
- Upon a successful import, a list of previous imports will be displayed.

ROLLBACK EVENT IMPORT
This feature will remove the events that were created during the selected import. To rollback events:
- Navigate to the Events Management tile (Dashboard > Events Management)
- Click the IMPORT EVENTS button.
- Click the LIST IMPORTS tab at the top of the screen.

- Locate the Import you want to Rollback
- Click the Rollback link located directly under the Import record

- To confirm you want to perform the Rollback option which will delete events that were created during the import click the ROLLBACK button; or
- Click CANCEL to return to the import list without rolling back.
NOTE:
When a rollback action has successfully completed, the Import record will still be displayed, however, the Rollback link will not be shown and the processed, imported and error columns will show 0. Below is an example of an import record after it has been rolled back.

DELETE EVENT IMPORT RECORD
This feature will delete the import record but will not remove events that were imported. You cannot rollback event imports once an import record has been deleted. To delete event import records:
- Navigate to the Events Management tile (Dashboard > Events Management)
- Click the IMPORT EVENTS button.
- Click the LIST IMPORTS tab at the top of the screen.

- Locate the Import you want to delete.
- Click the Delete link located directly under the Import record.

- To confirm you want to perform the Delete action which will remove the import record, click the DELETE button; or
- Click CANCEL to return to the import list without deleting the Import record.
CAUTION:
This deletes the import record but does not delete the events that were imported. If you delete an import record you will need to manually remove any events that were created during the selected import.
ENABLE EVENT MANAGER PERMISSION
By default, users with an Event Manager role cannot publish new events. To give Event Managers the ability to Import and Rollback events follow the steps below:
- Navigate to the Site Configuration Tile (Dashboard > System Configuration > Site Configuration)
- Click on the Events Settings Tab.
- Check the ‘Allow Event Manager to Rollback Imported Events” Box.
- Click the SAVE CONFIGURATION button.
