Import Users
Item request has been placed!
×
Item request cannot be made.
×
 Processing Request
What is Import Users?
This function allows you to import a large list of users via a CSV file. These users will all receive the user role "Patron".
Configure Import Settings
- If you will be doing multiple uploads of user data, you can configure your import settings to enable an 'Uploads Directory'
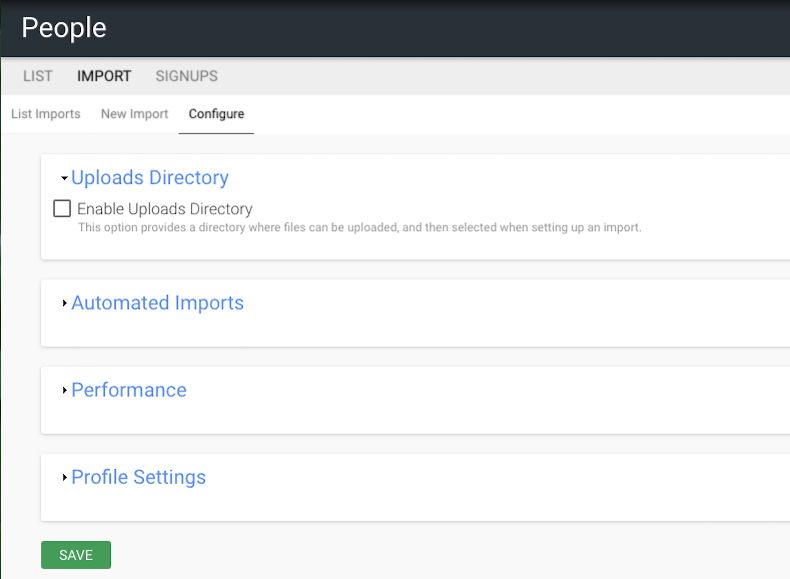
- Automated Imports allows you to create a directory which will be scanned for any new files uploaded and automatically used to create new user accounts.

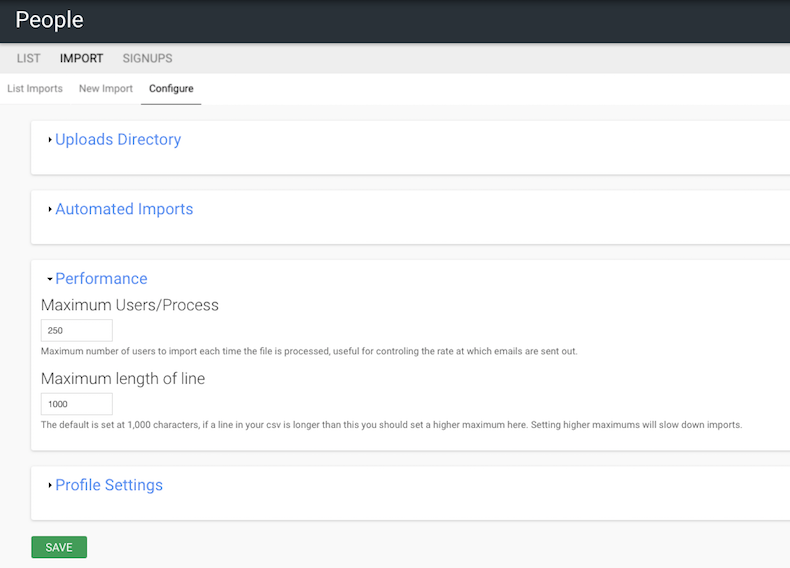
- The performance tab allows you to determine the maximum number of users to import each time the file is processed
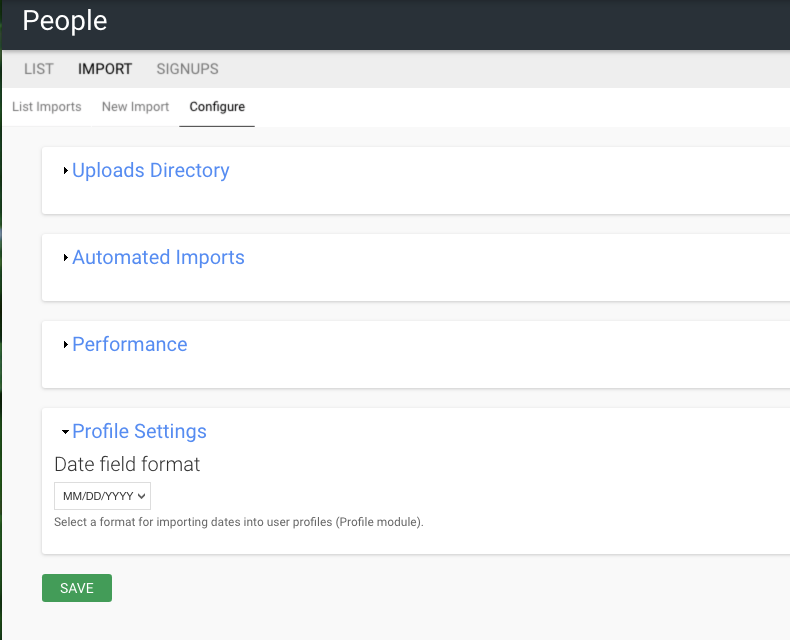
- Profile Settings - lets you define the format of the date
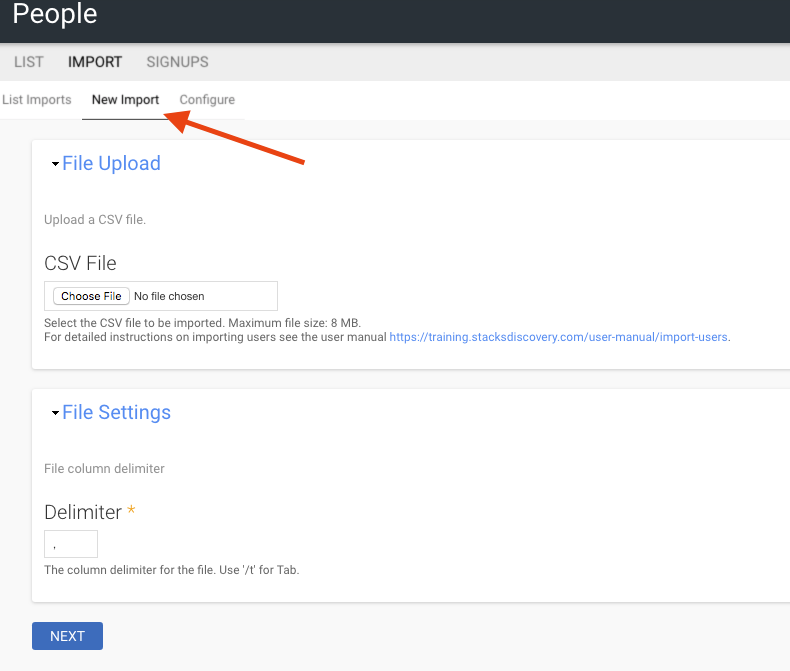
Upload a File
- Navigate to the "Integrations" tile on your dashboard and open the User Import" tile
- Click "Choose File" and select the desired CSV file from your file browser
- Set the delimiter if you will have more than one item per field. The delimiter will separate items in a field.
- Click "Next"
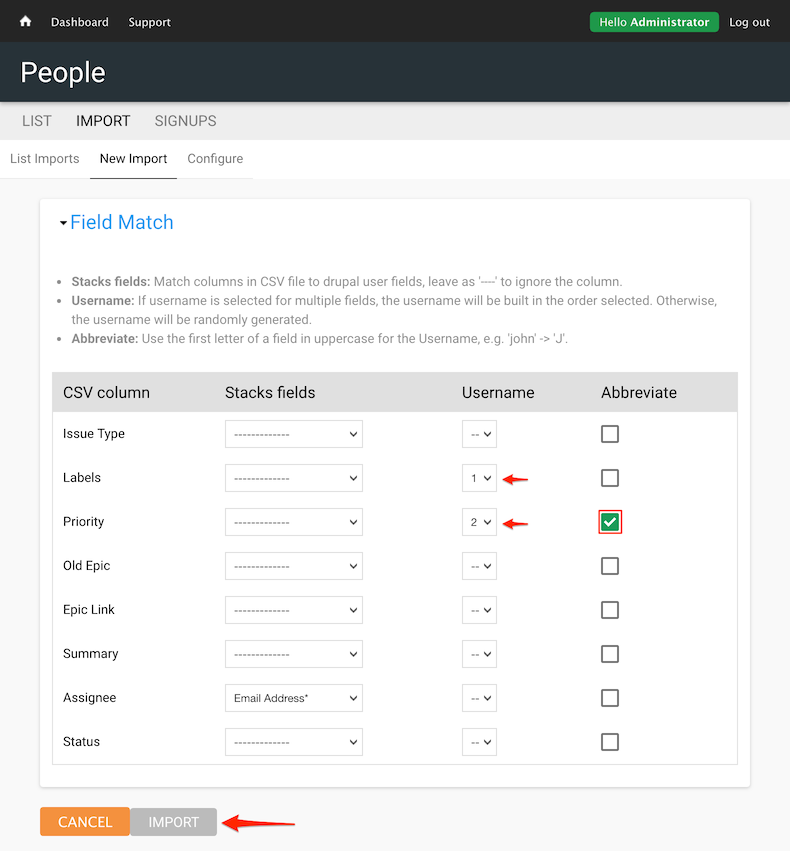
Map File Columns to Stacks Fields
You must have a column of email addresses as Stacks users require a unique email address. The file you have just imported will be read and the column headers will display in as row titles in the import mapping table.
- For each row heading choose the appropriate Stacks Field as a destination for that data (fields other than "email address" are optional)
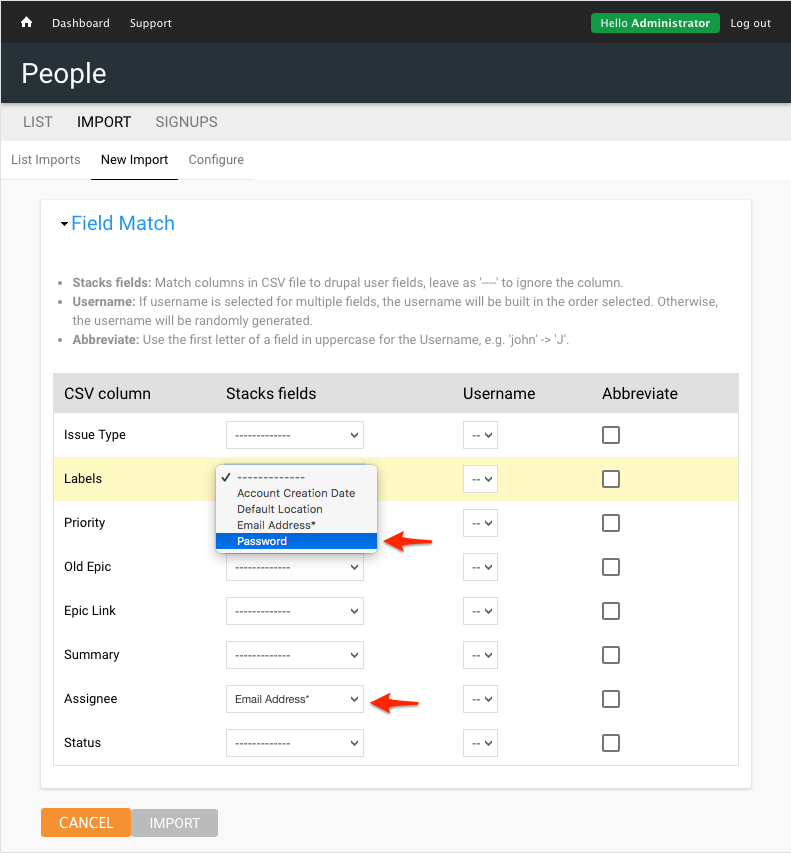
Generate the User Name
You can combine multiple rows into the username field during the import.
- For each desired row heading you may assign a number in the Username column of the import mapping table
- The column header you assign a 1 will be the first word of the username
- You can assign more rows a number and they will be merged into the username with no space added
- If you check the box marked abbreviate the system will only use the first letter of the data in that row
- Click "Import" to create users from this file