Resource Flows
 Processing Request
Resource Flows are visual lists of resources featuring your reading lists viewed on your site as scrolling book jackets linked to your catalog listings.
When integrated with EDS or your ILS, items can be queried to automatically populate information such as the ISBN, UPC, Title, Author, bibid, Call number, a book jacket, or thumbnail link to your catalog.
Resource flows can also be printed.

To Create a Resource Flow:
- Navigate to the Resource Flow tile (Dashboard > Resource Flow).
- Click on the ADD NEW button.
- Select the Language from the Language drop-down list.
- Provide a Title for the Resource flow.

To Autofill Resource information with EDS / ILS:
- In the resources section, enter the ISBN number and click the QUERY EDS button (or Query ILS Button if applicable).

- Book information will automatically populate with available information.
To Manual Enter Resource Information:
- Enter information for any applicable fields including the ISBN, UPC, Title, Author, BibID, Link.
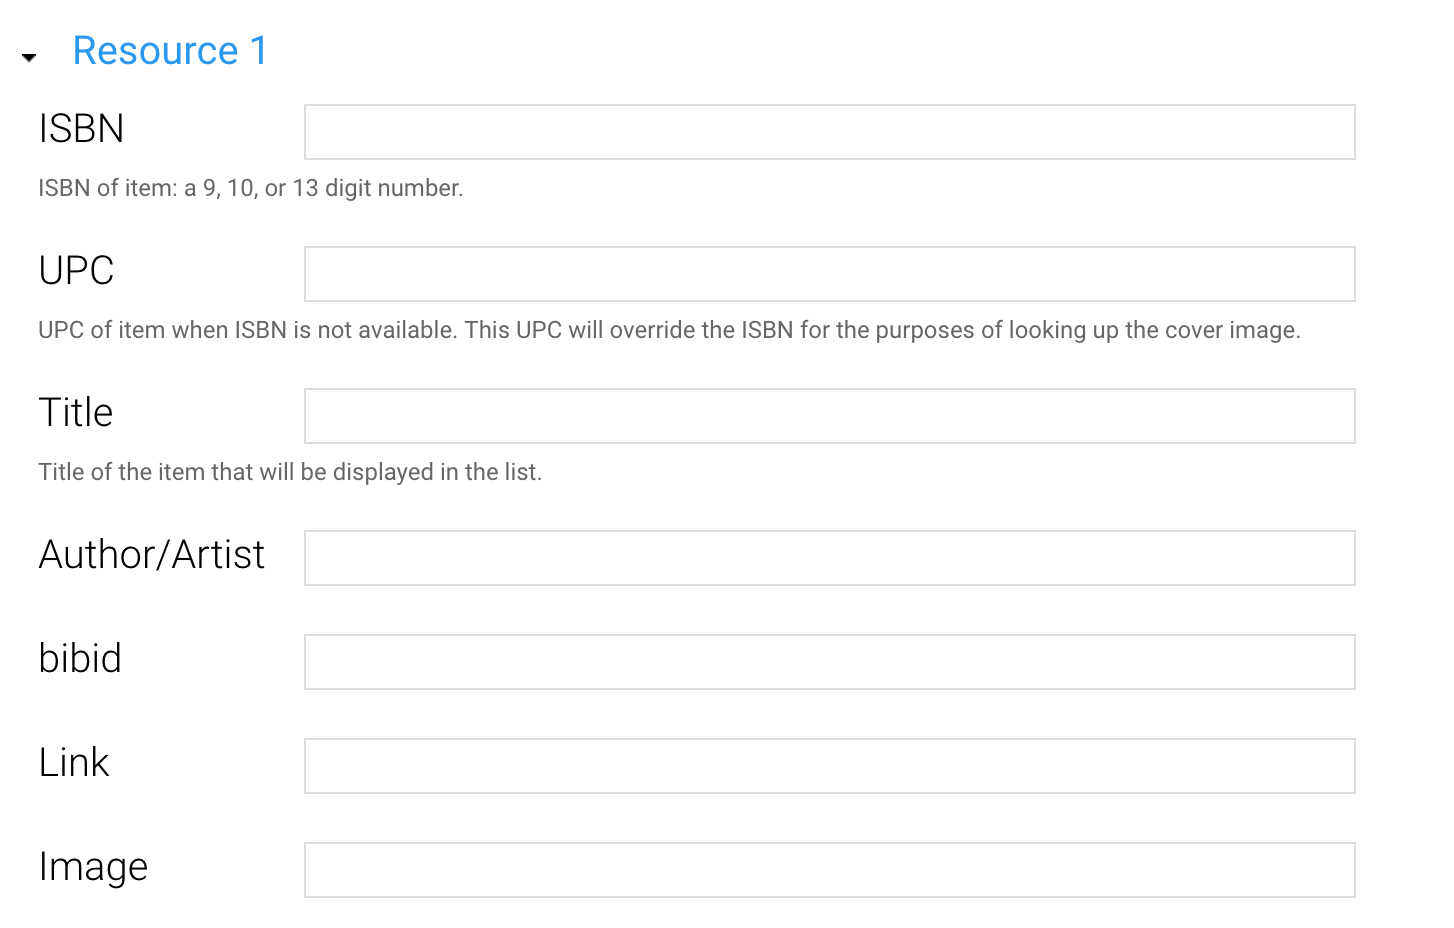
- Choose your Display Options:
- Request Item Button will display a button above items in Resource flows
- Availability Modal is an option for Sierra ILS to display the holdings information of a specific item in the resource flow.
- To add a Book Jacket Image:
- Add the URL of an image that is hosted on an external site; or
- Enable the Upload Image Manually option and click the BROWSE button

- Upload or select a previously uploaded file.
Note: External Book Jacket Image URLs may expire. When this happens, the image(s) will no longer be displayed in your Resource Flow. If you plan on having items that are listed in a resource flow for an extended period of time, we recommend that you manually upload book jacket images.
To Add additional Resources
- Click the ADD ANOTHER ITEM button
- Repeat the above steps to populate the fields.
To Save your Changes:
- Click the SAVE button.
- Navigate to the Resource Flow tile on your dashboard
- Find the Resource Flow you wish to edit in the list
- Click Edit to the right of the Resource Flow listing
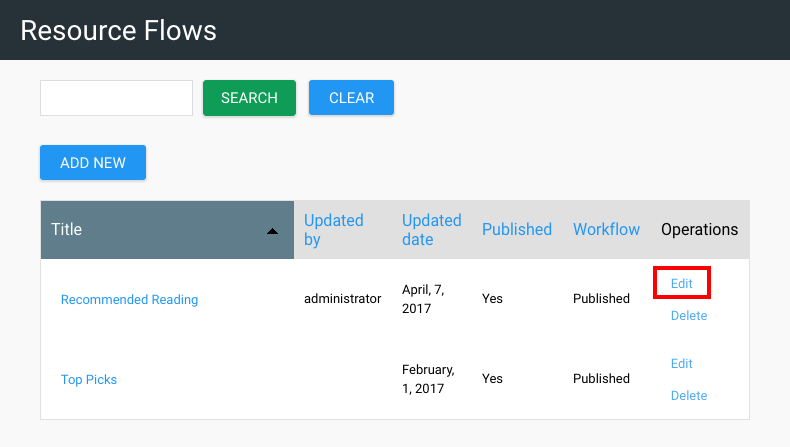
- Make any necessary edits to the Resource Flow
- Click SAVE to apply your edits
- Navigate to the Resource Flow tile on your dashboard
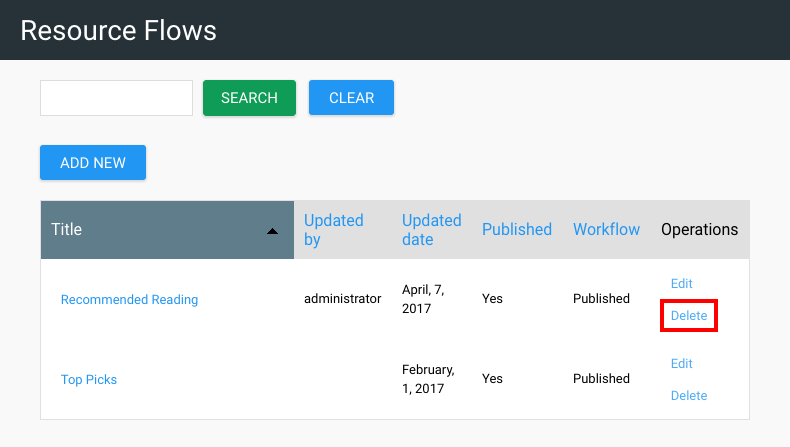
- Click DELETE to the right of the Resource Flow listing
- Click DELETE to confirm the removal of this Resource Flow
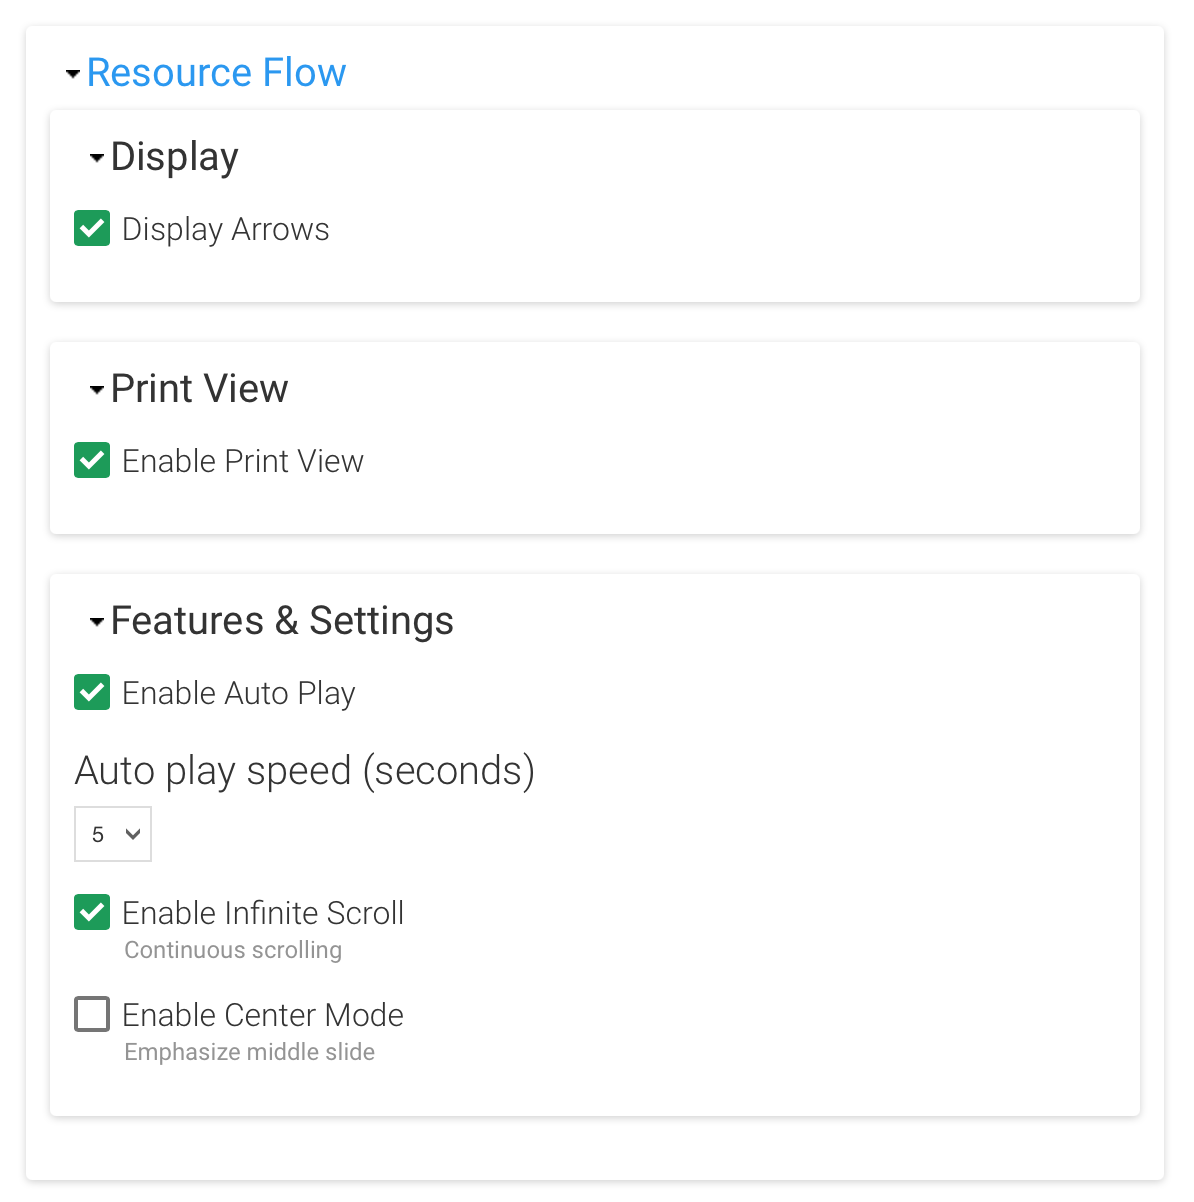
You have options to customize your Resource Flows by toggling these options on/off:
- Display Arrows - This gives users controls to scroll through items by adding arrow buttons on the left and right sides of Resource flows.
- Enable Print View - Display a Print Preview button allowing users to view and print the items in the Resource flow.
- Enable Auto Play - Will cause Resource flows to automatically scroll through items.
- Auto Play Speed - Set the duration that resource flows will pause on each item before scrolling to the next.
- Enable Infinite Scroll - Will cause the Resource flow to continually scroll through the set of items.
- Enable Center Mode - Item in the middle will appear larger to palce emphasis on the item and draw attention to the center.
To manage the Slider Settings
- Navigate to the System configuration dashboard page.
- Select the Slider Settings tab.
- Click on Resource Flow to view all Resource flow options.
- Set your desired options.
- Click the Save Configuration button to apply changes.
Stacks can automatically import RSS Feeds from Sirsi Blue Cloud or III Sierra into a Resource flow that will display the latest 25 items from the feed. New items will update approximately once per hour.
To create the Resource flow from the Sirsi Blue Cloud or III Sierra RSS Feed:
- Navigate to your Online Catalog
- Perform a search in your catalog and add any filters or limiters that you wish
- Click on the RSS Feed icon
- You will see a screen full of computer code open

- Copy the URL on this screen
- Navigate to your Stacks dashboard
- Open the 'Resource Flows' tile
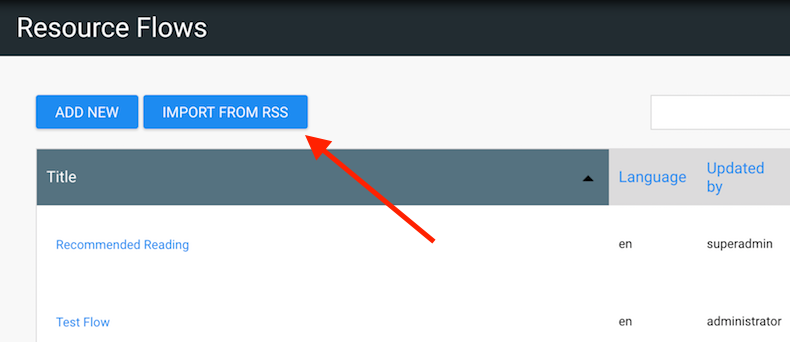
- Click the 'Copy from RSS' button
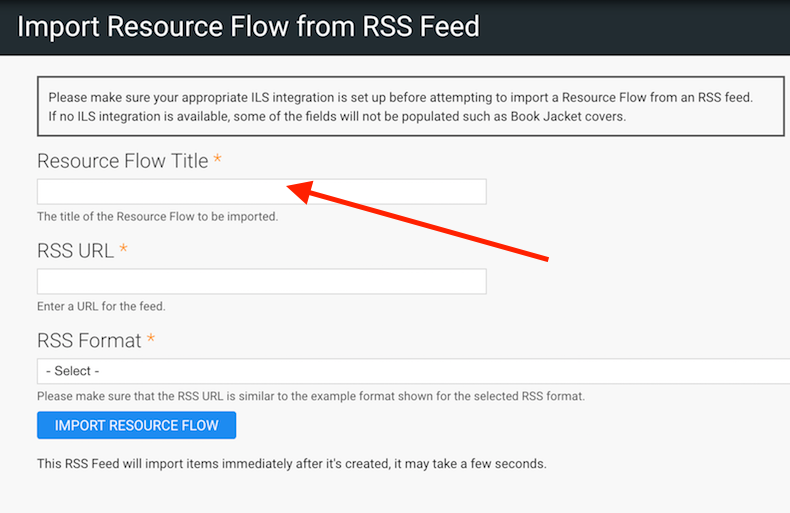
- Add a title to your Resource Flow
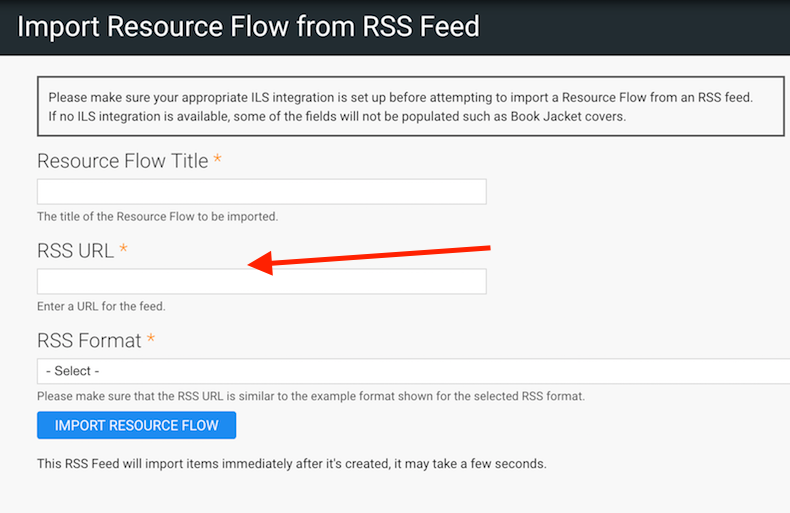
- Paste the RSS Feed URL
- Select the RSS Format 'Sirsi Blue Cloud' or 'III Sierra'
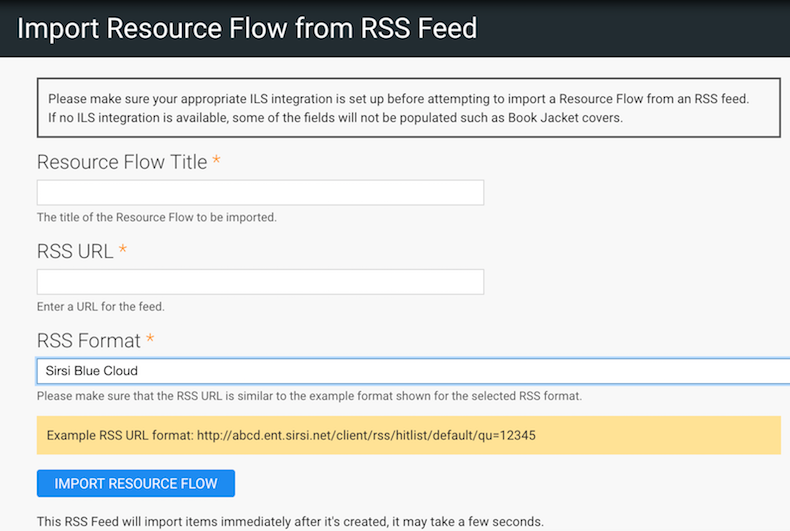
- Click 'Import Resource Flow'
- The Resource Flow will now appear in your Resource Flow list
- Click the title to open and view your Resource Flow
- You can now add this Resource Flow to a Landing Page
Check out how the Stacks Community is using Resource Flows:
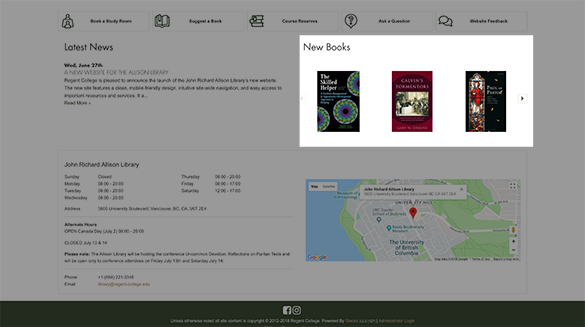
Regent College - Allison Library (New Books)
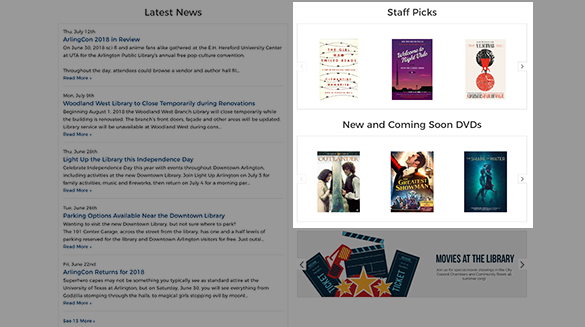
Arlington Public Library (Staff Picks, New Coming Soon DVDs)
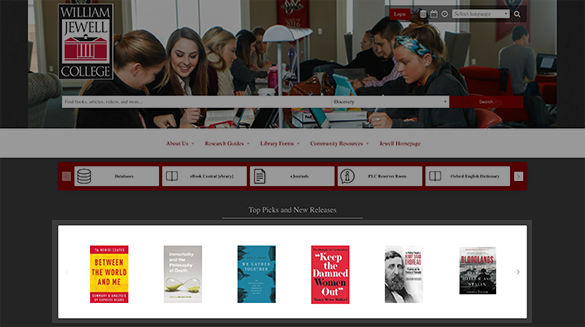
William Jewell College (Top Picks and New Releases)
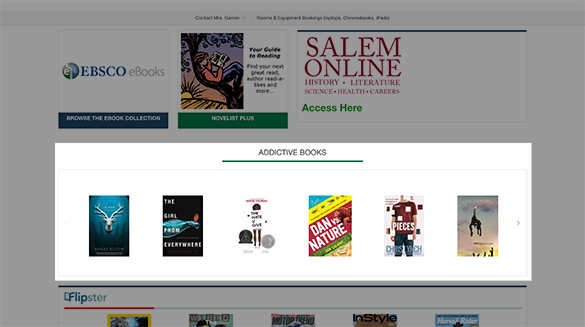
Essex Technical High School (Addictive Books)
ENABLE PRINT PREVIEW FOR ALL USERS
To enable the Print Preview button for all users, complete the following steps:
- Log into the Stacks site as an Administrator.
- Navigate to the Site Configuration dashboard page (Dashboard > System Configuration > Site Configuration).
- Select the Slider Settings tab.
- In the Resource flow section place a checkmark in the Enable Print View option.
- Click the Save Configuration button to apply your changes.
CONFIGURE PRINT OPTIONS FOR RESOURCE FLOWS
Each Resource Flow has a unique set of printing options. Follow these steps to configure the printout settings for a Resource flow:
- Log into the Stacks site as an Administrator.
- Navigate to the Resource Flows dashboard page (Dashboard > Resource Flows).
- Locate the desired Resource Flow and click the corresponding Edit link in the Operations column.
- Click Settings located in the Menu bar.
- Configure the Page options:Show or Hide the Resource Flow title.
- Show or hide Borders.
- Choose to Print the resource flow in a Grid or List layout.
- Choose the fields to appear on the printout by placing a checkmark next to each desired item. Printouts will not include unchecked items.
- Image
- Title
- Author / Artist
- Link
- Call Number
- ISBN
- UPC
- bibid
- Click the Save Configuration button to apply your changes.
ADD A RESOURCE FLOW TO A LANDING PAGE
Complete the following steps to add a Resource Flow to a Landing page.
- Log into the site as an Administrator.
- Navigate to the Landing Pages dashboard page (Dashboard > Landing Pages).
- Click on the name of the Landing page you want to edit.
- Click on customize this page button at the bottom of the Landing page.
- Click the + button inside the empty space above the column you want to place your Resource Flow.
- In the content selection window that appears, click the Resource Flows tab.
- Click on the name of the Resource Flow you want to add.
- Click Finish to save the configuration; or Click Cancel to disregard the configuration.
- On the Landing Page, click the Save Button to apply your changes; or Click the Cancel button to disregard
