SharePoint Catalog Configuration
 Processing Request
SharePoint is a web-based collaborative platform that integrates with Microsoft Office. Launched in 2001, SharePoint is primarily sold as a document management and storage system, but the product is highly configurable and usage varies substantially between organizations. In Stacks, you can create a searchable catalog of the content in your cloud based Office 365 SharePoint system.
Additional SharePoint Integrations
In addition to the standard SharePoint integration, Stacks can provide professional services for additional features including:
- Feeds
- Import & Export content
Contact your EBSCO representative for more information on these professional services.
There are 3 steps to the process of setting up this Stacks-SharePoint Connection:
-
Generate keys on your local workstation (In this case we recommend using Keycred to generate keys. It’s available at https://github.com/formio/keycred)
-
Create a new "App" in Azure Active Directory (AAD) and configured the permissions and encryption keys. Visit the Azure Portal at https://portal.azure.com with your Admin user.
-
Configure the SharePoint integration in your Stacks site.
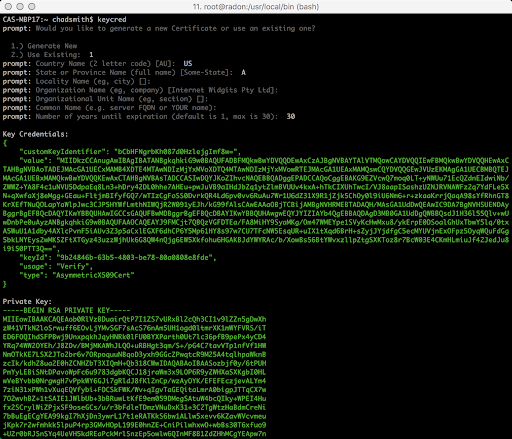
Step 1 - Using Keycred to Create a Key Pair for Azure
-
Download and run the keycred tool filling out the 7 questions with your organization details.
-
Record the 4 sections of the results which you will need for Azure and Stacks. The sections are:
-
Key Credentials
-
Private Key (Copy this snippet including BEING and END into a file called Private.key)
-
Certificate (Copy this snippet including BEING and END into a file called Public.crt)
-
Certificate Fingerprint
-
Step 2 - Add a new App to the Azure Active Directory App Registrations
-
To start select Azure Active Directory → App registrations blade
-
Click "New application registration"
-
Use the following values:
-
Application Type: Web app/API
-
Sign-on URL: https://www.stacksdiscovery.com
-

-
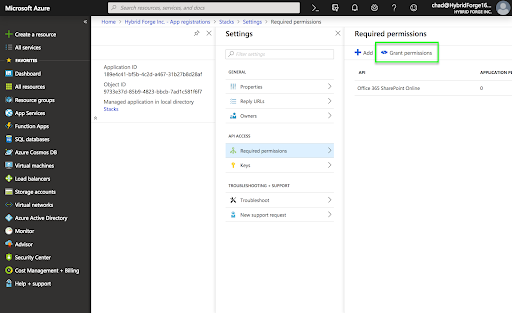
Select the Settings option to display the Settings blade
-
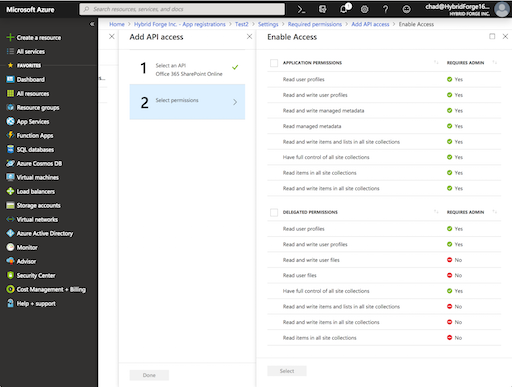
Select "Required Permissions" then click “Add”
-
Click "Select an API" then click "Office 365 Sharepoint Online" and press the “Select” button
-
Assign the following permission:
-
Read User Profiles
-
Read managed metadata
-
Read items in all site collections
-
Delegate Permission
-
Read User Profiles
-
Read items in all site collections
-
-
-
Click the “Grant Permissions” button to commit the changes.
Navigate to the Keys blade
-
Select the Upload Public Key then select the “Public.crt” file you created above.
-
Click “Save”. You have a successfully added the app to Azure.
Step 3 - Configure the Azure Connection in Stacks
-
Login to your Stacks site as an administrator.
-
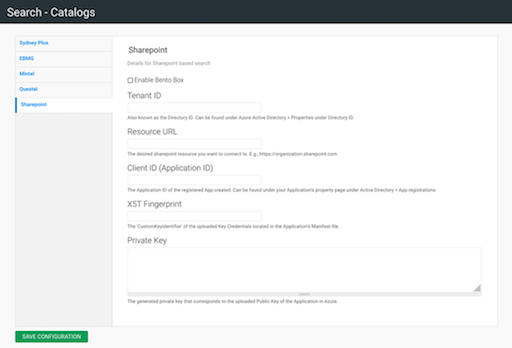
Navigate to the Search Configuration tile and select Catalogs and then SharePoint from the drawers.
-
Enter the values from your Office 365 Configuration:
-
Tenant ID (Also known as the Directory ID. Can be found under Azure Active Directory > Properties under Directory ID)
-
Resource URL (The desired SharePoint resource you want to connect to. E.g., https://your-organization.sharepoint.com)
-
Client ID (Aka Application ID The Application ID of the registered App created. Can be found under your Application property blade in Azure Active Directory > App registrations)
-
X5T Fingerprint (This is displayed in the Key Credentials display from the Keycred tool in Section - The 'CustomKeyIdentifier' of the uploaded Key Credentials located in the Application's Manifest file.)
-
Private Key (Paste the private key value from Section 1 including the BEGIN and END section
-
-
Press “Save”. You have successfully added the SharePoint search to your Stacks site.
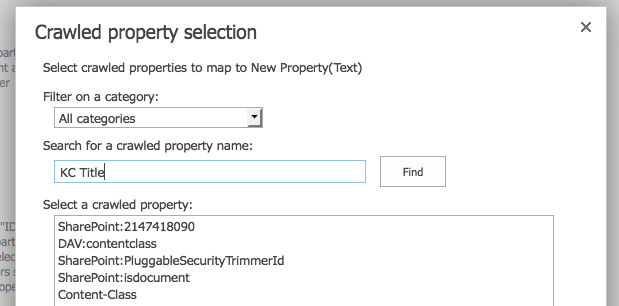
- Login in to Sharepoint then navigate to go to Site Settings > Search Schema
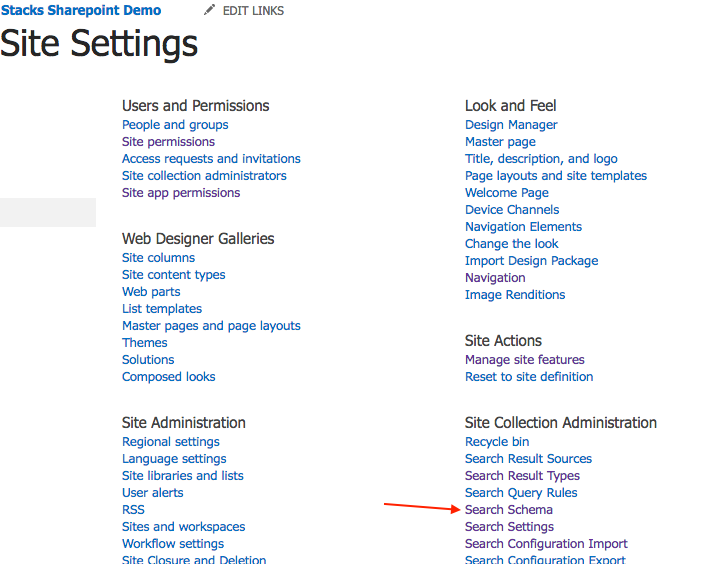
- In the Search Schema page, they will need to create a Managed Property for each of the Columns (also known as Crawled Properties) by mapping them together.
-
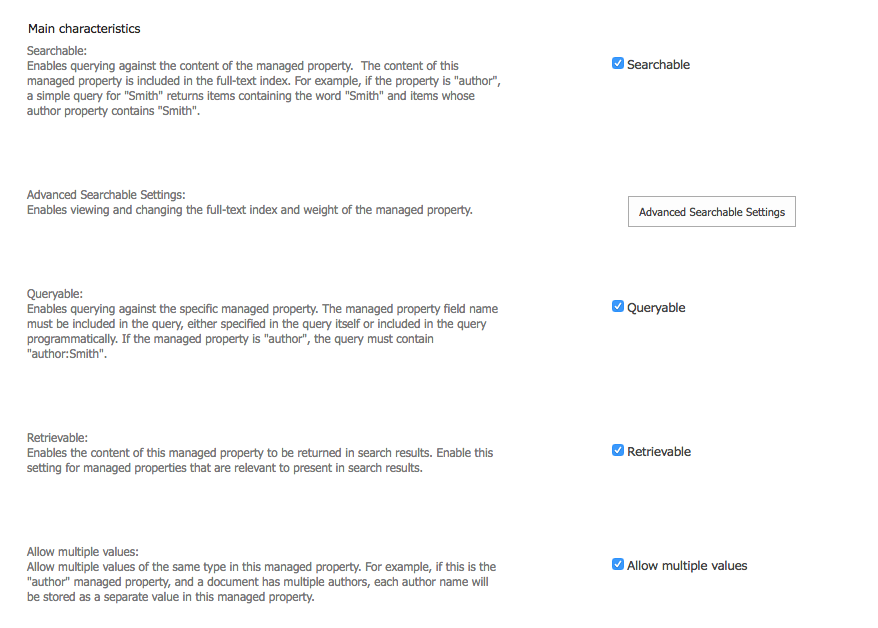
Add Managed Property

-
Fill out the forms and check searching and queryable and also make sure that “Retrievable” is checked.
-
Map the property to the crawled property by Add a Mapping and Searching for the columns, such as “KC Title”

- Please enable these settings for each of the fields (properties) that they need released.