Site Configuration
 Processing Request
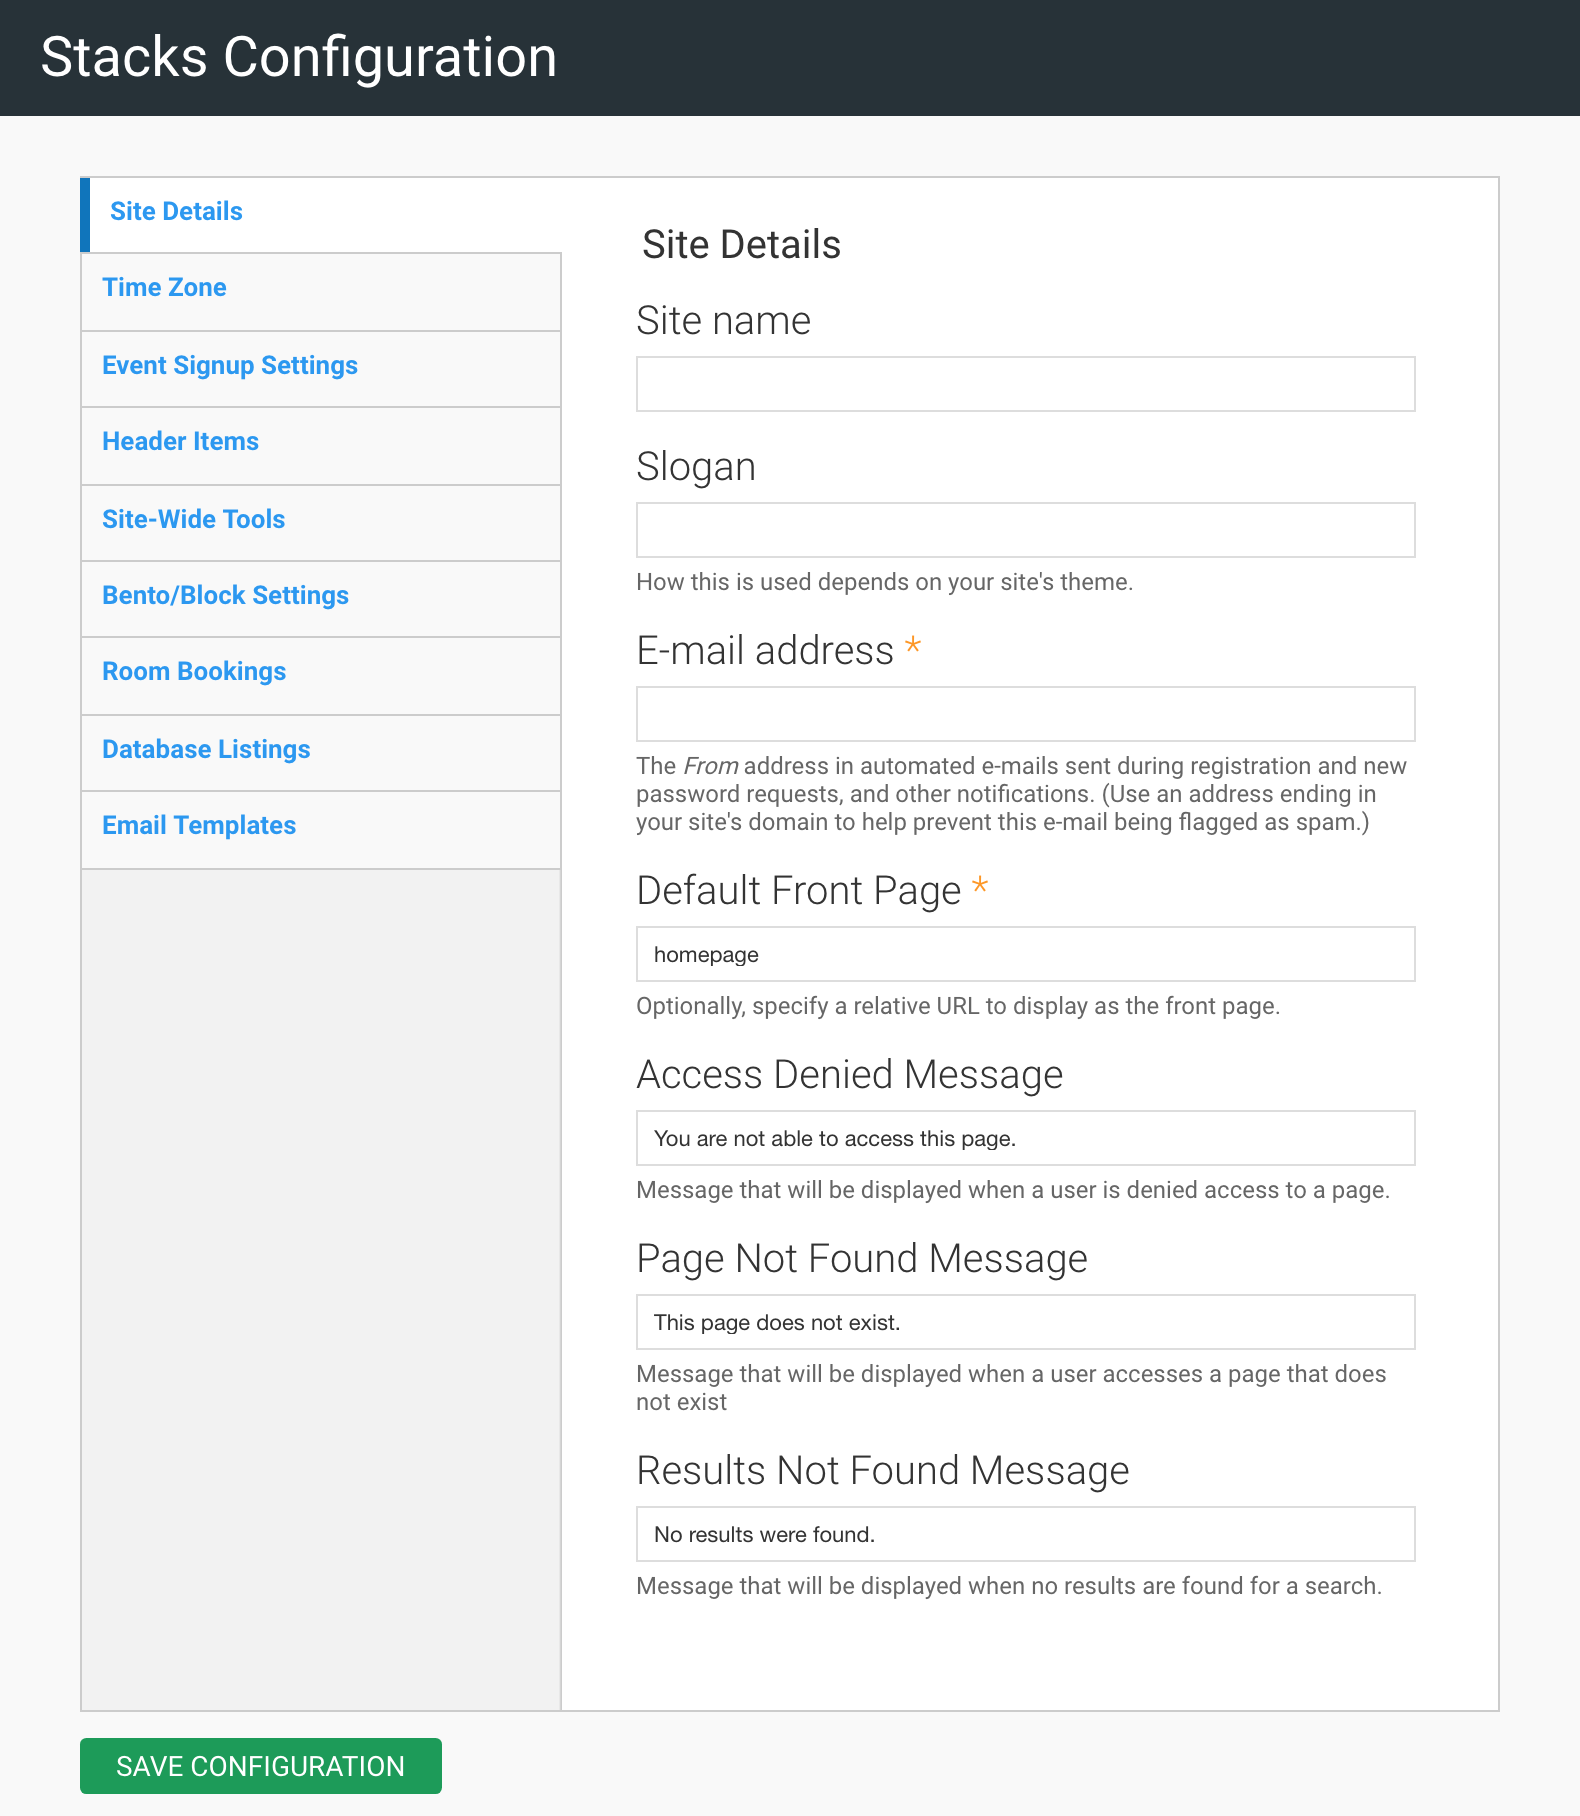
Configure site-specific details including the site name and slogan (which can appear in the header), the email address from which automated emails will be sent from, the icons you will see on your homepage, your timezone, and more.
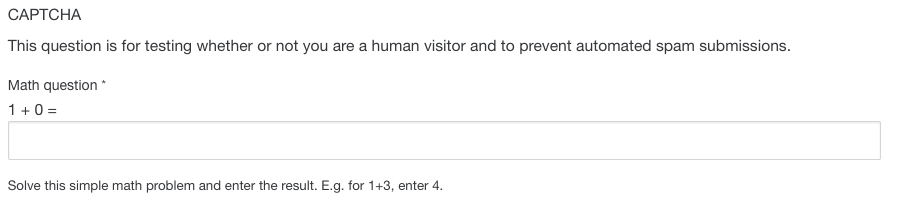
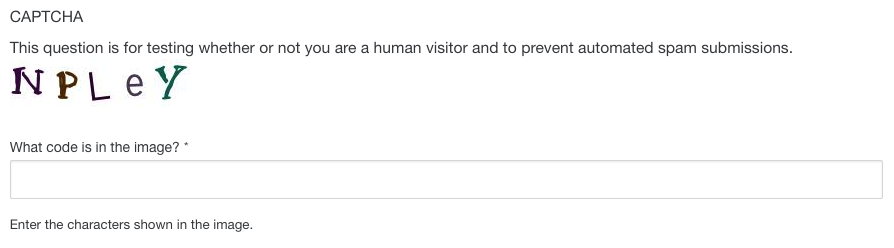
CAPTCHA (Completely Automated Public Turing Test) is used to validate the user as a human rather than a robot. Stacks can be configured to require end users to complete a CAPTCHA test before submitting forms using one of the following methods:
- Math – users will need to accurately answer a simple math question.
- Image – users will need to enter the code that is displayed in an image format.
- reCAPTCHA – Provided as a free service from Google, reCAPTCHA will validate the end-user by clicking the checkbox “I’m not a robot.”

More information about reCAPTCHA (From Google)
reCAPTCHA is a free service that protects your website from spam and abuse. reCAPTCHA uses an advanced risk analysis engine and adaptive challenges to keep automated software from engaging in abusive activities on your site. It does this while letting your valid users pass through with ease.
To use reCAPTCHA you must first register for free.
Get Your reCAPTCHA API Keys
- Go to the Google website for the Google reCAPTCHA API https://www.google.com/recaptcha
- Register with Google by clicking on the 'My reCAPTCHA' button in the top right-hand corner of the page
- Enter your website URL into the text field under 'Label'
- We recommend that you choose reCAPTCHA v2, and choose the 'Checkbox' option
- Accept the 'Terms of Service'
- Click on 'Register'
- You will now see the code for the 'Site Key' and the 'Secret Key'
Configure CAPTCHA
- Navigate to the Site Configuration tile (Dashboard > System Configuration > Site Configuration)
- Open the Anti Spam tab
- Select the Default Captcha, choosing from:
- Math
- Image
- reCAPTCHA
- If you are using reCAPTCHA provide the site key and secret key that was provided when you registerd for reCAPTCHA.
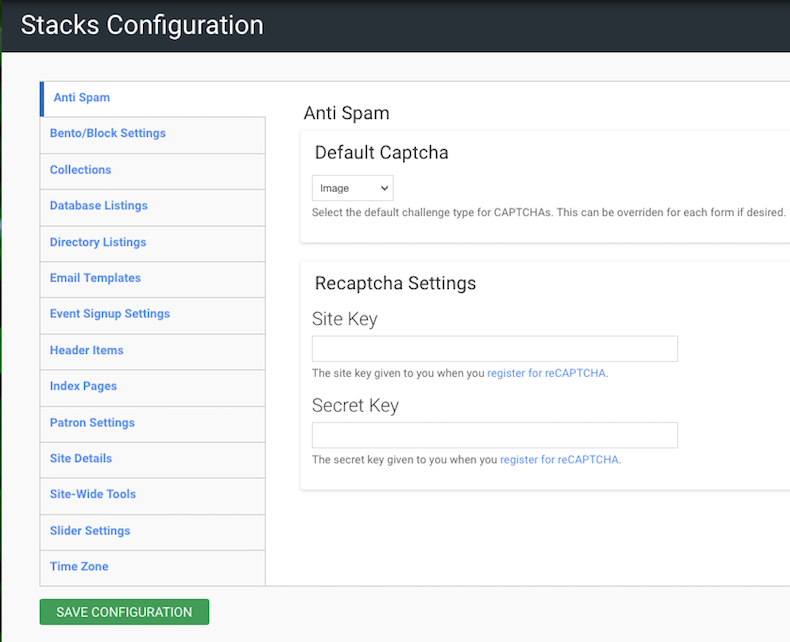
- Click the SAVE CONFIGURATION button to apply changes.
Enable CAPTCHA on EasyForms
By default, Captcha is turned off. These steps need to be followed on each form you wish to use captcha with.
-
Navigate to the Form Settings Window (Webform > Form Settings)
-
In the Spam Prevention section
-
Check the Enable Captcha box to turn on the Captcha test; or
-
Uncheck the Enable Captcha box to turn the Captcha test off.
-
-
Click the SAVE CONFIGURATION button to apply changes.

This tab allows you to configure your Bento settings.
- You can decide whether to hide the icons by toggling on that feature.
- You can control whether the results boxes in the Bento Search area appear and display a no result message or simply do not appear when they do not return any results for the current search.
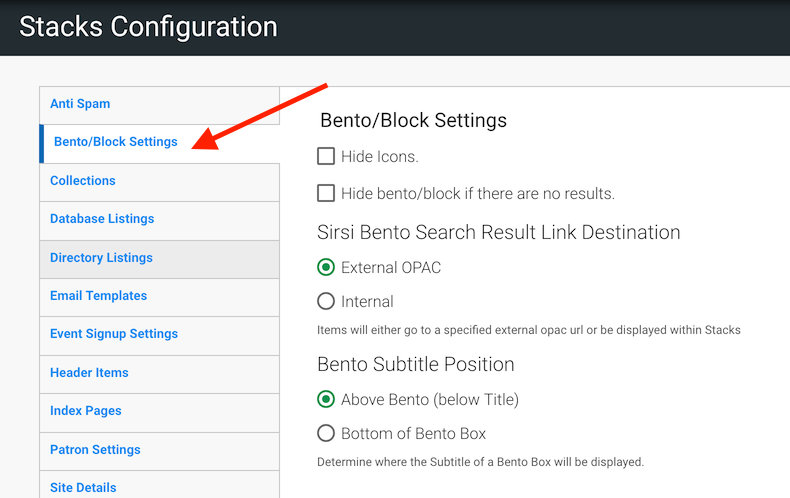
- You can also configure your Sirsi integration here: you can decide whether Items will go to a specified external opac url or be displayed within Stacks.
- Choose here where you want the Bento Subtitle to display, either above the bento box or beneath the bento box.
- Click 'SAVE CONFIGURATION'
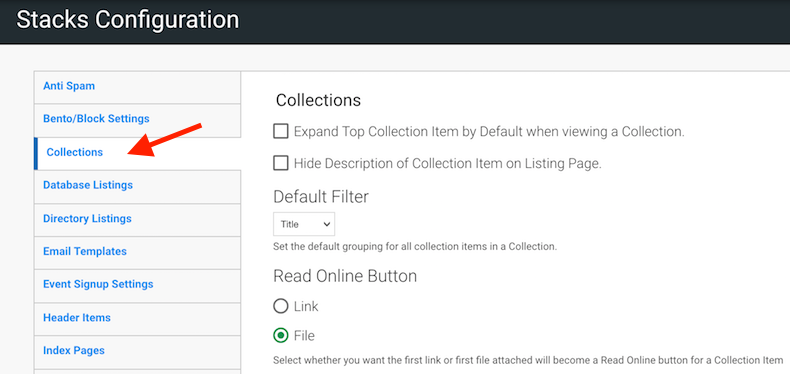
Your Collection Settings can be configured here.
- Choose to have the first collection item expanded by default when you view the collection.
- Choose to hide the description of a collection item on the Listing Page.
- Choose the default filter to sort your collection e.g. Sort by Title or Publication or Author (or any of the filters you have set up for your specific collection)
- Choose whether the 'Read Online' button will direct users to the first link in your collection item OR the first file attached
- Click 'Save Configuration'
Configure Display options for the Database Listings.
- To expand the top accordion by default in database listings, add a checkmark to Expand Top Accordion by Default in Database Listings View.
- To enable the Expand and Collapse buttons at the top of Database Listings that will allow you to expand all database listing accordions, add a checkmark to Enable Expand/Collapse Buttons to Database Listings Page.
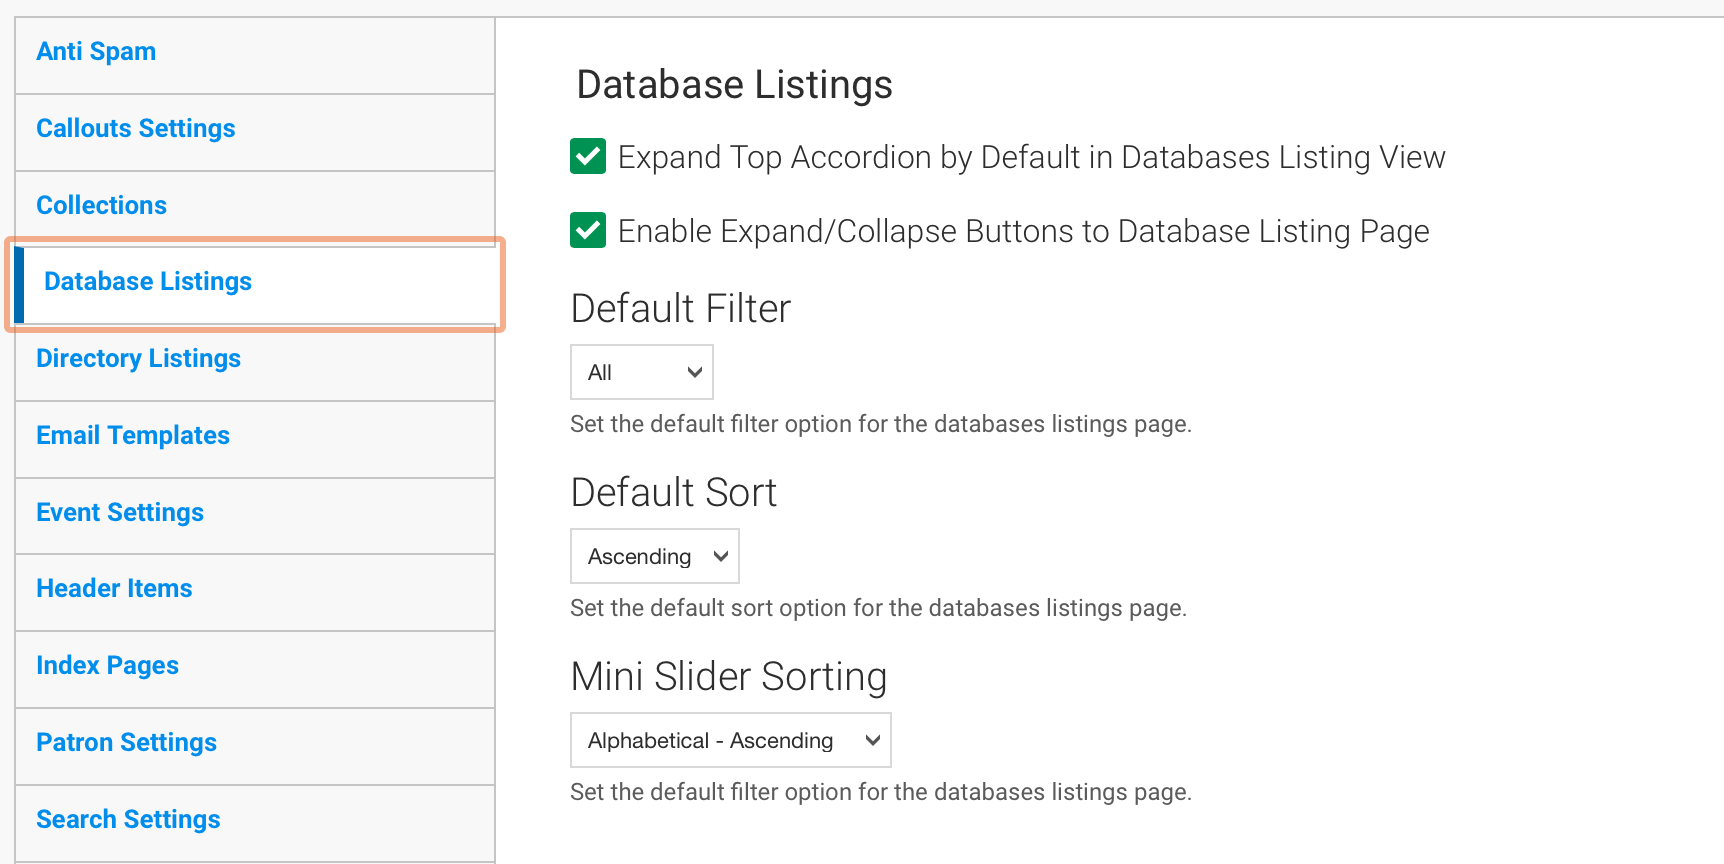
The default filter selector allows you to define how the listings should be organized when the user initially lands on this page, to enable this feature:
- Select your preference in the dropdown list
- Click 'SAVE CONFIGURATION'
The default Sort allows you to determine how the listings will be sorted, either in ascending order or descending order.
- Select your preference in the dropdown list
- Click 'SAVE CONFIGURATION'
The Mini Slider Sorting allows you to determine how the mini slider on the database page is sorted. You can choose ascending or descending alphabetical order, or sort by date added.
- Select your preference in the dropdown list
- Click 'SAVE CONFIGURATION'
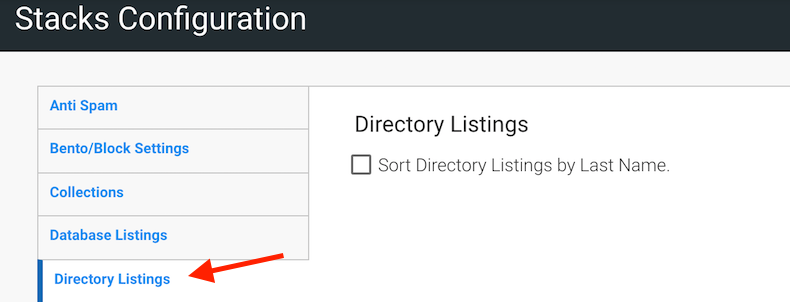
Choose your settings here for your Directory Listings Page.
- Choose whether you want your directory listings to be sorted alphabetically by last (or family) name.
- Click 'Save Configuration'
The Email templates tab allows you to customize the following Email Notifications:
- Account Activation Notifications
- If enabled, will send a message to users upon account activation.
- If enabled, will send a message to users upon account activation.
- Account Blocked Email Notifications
- If enabled, a message will be sent to the user when their account is blocked.
- If enabled, a message will be sent to the user when their account is blocked.
- Account Cancellation Notification
- If enabled, a message will be sent to the user when their account is canceled.
- If enabled, a message will be sent to the user when their account is canceled.
- Account Cancellation Confirmation
- Sent to users when they attempt to cancel their account.
- Sent to users when they attempt to cancel their account.
- Welcome Email (Awaiting Approval)
- Sent to new members upon registering when administrator approval is required.
- Sent to new members upon registering when administrator approval is required.
- Welcome Email (No Approval Required)
- Sent to new members upon registering when no administrator approval is required.
- Sent to new members upon registering when no administrator approval is required.
- Welcome Email (New users created by an administrator)
- Sent to new members upon an account being created by an administrator.
- Sent to new members upon an account being created by an administrator.
- Password Recovery
- Sent to users who request a new password
To Modify an Email Template:
- Navigate to the Site Configuration Tile (Dashboard > System Configuration > Site Configuration
- Click on the Email Templates tab
- Click on the title of the desired email template to expand the section
- Make any necessary changes.
- Click the SAVE CONFIGURATION button after making your edits.
Configure the default settings for event signups. These are the signup details that are given to new events created in your Stacks site.
- Send signups to: Email address that will receive an email every time someone registers for this event
- Send confirmation: If enabled, the system will send an email to users when they signup, with confirmation details
- Confirmation email: Defines the body text of the confirmation email
- Send reminder: If enabled, the system will send an email to users when at the defined time prior to the event start
- Sign up limit: Max default number of registrations for events

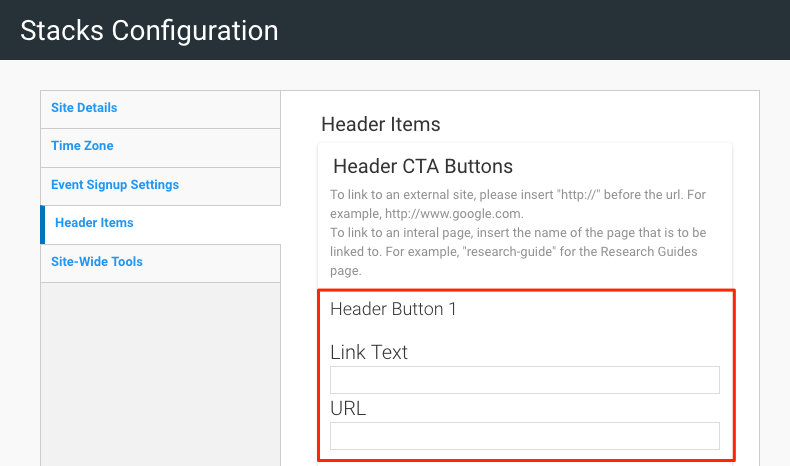
Optional: To link to an external site, provide the text for the link that will appear in the header, as well as the URL for the site
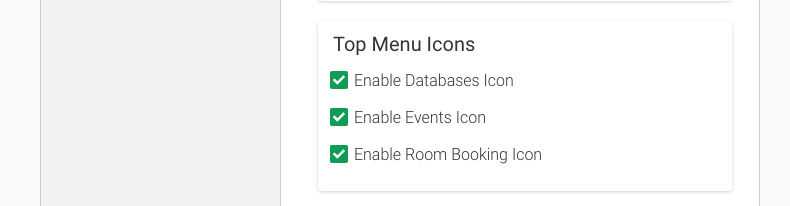
Choose which icons, if any, should appear in the Top Menu
![]()
Choose whether to enable or disable the ‘Font Resizer’

Choose whether to enable or disable the Google Translate toggle

Enable or disable 'Stacks Website Search'
- Enabling this feature will allow users to search content your organization has created on the website rather than only that provided by your EDS or ILS configuration

Verify that your Locations and Hours are properly configured
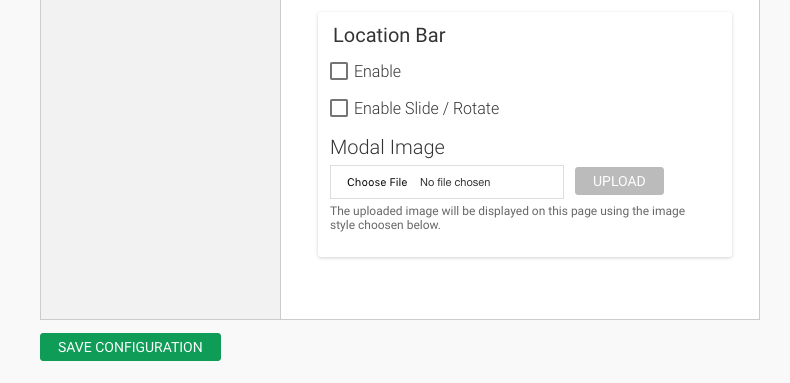
Optional: Configure a Location Bar
Click the 'Enable' checkbox
Optional: Click the 'Enable Slide/Rotate' checkbox IF you would like the element to rotate through multiple locations
Optional: Click 'Choose File' to upload an image to include in the modal that appears if the user clicks on the Location Bar
- This bar will be added to the header and can be set to display either the first location in your locations list or to rotate through all locations
![]()
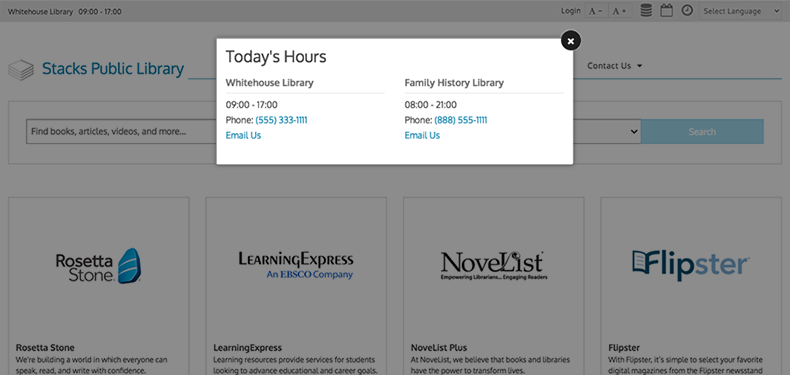
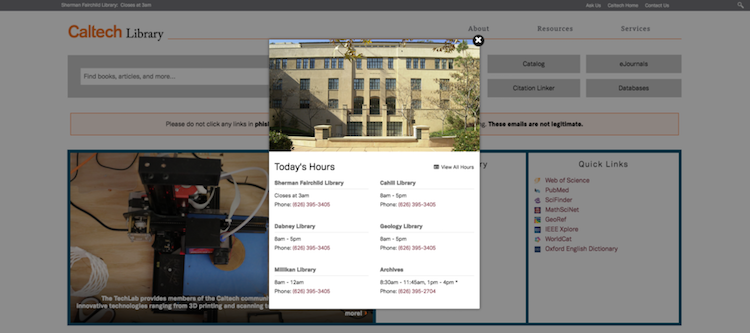
- If the user clicks on this bar, a modal will pop up with that location's hours for the current day along with their contact information. If you've chosen to include an image with the modal (modal image), it will be included at the top of this popup.
For more information about configuring the Location Bar, including a video, see the Location Bar tab
The Location Bar appears in the header of your homepage. It will display today's hours for your location. If you have more than one location, you can enable the location bar to scroll/rotate through the information for each of your locations. When you click on the location bar, a location modal will pop up on your screen listing today's hours and contact information. Closed Dates can be set to display in your Location Bar - read more about Closed Dates
- To configure your Location Bar, first verify that your Locations and Hours are properly configured (read more)
- Navigate to your dashboard and open the 'System Configuration' tile.
- Open the 'Site Configuration Tile'
- Select the 'Header Items' tab
- Scroll to the bottom of the page to the 'Location Bar'
- Click the 'Enable' checkbox
- Optional: Click the 'Enable Slide/Rotate' checkbox IF you would like the element to rotate through multiple locations
- Optional: Click 'Choose File' to upload an image to include in the modal that appears if the user clicks on the Location Bar
- This bar will be added to the header and can be set to display either the first location in your locations list or to rotate through all locations
![]()
- If the user clicks on this bar, a modal will pop up with that location's hours for the current day along with their contact information. If you've chosen to include an image with the modal (modal image), it will be included at the top of this popup.
To Configure Closed Dates for your Location Bar:
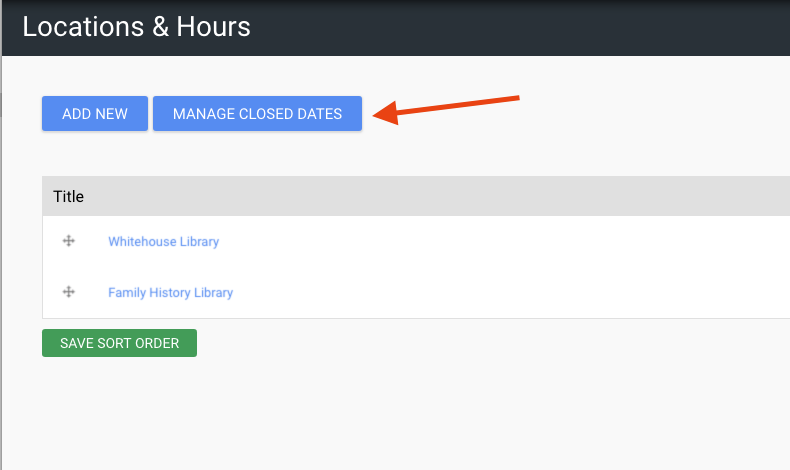
- Navigate to the 'Location & Hours' tile on your Dashboard
- Click on 'Manage Closed Dates'
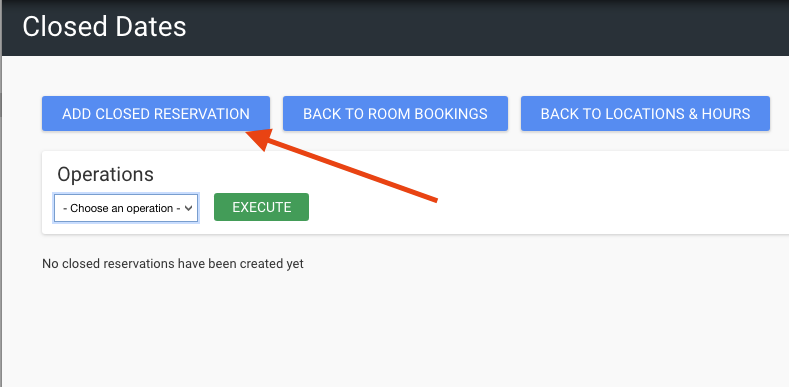
- Click on 'Add Closed Reservation'
- Add a 'Purpose' for example "Christmas Day"

- Choose which locations you want this closed date to apply
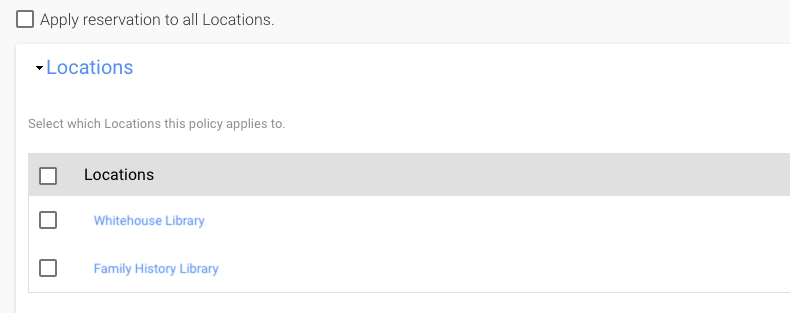
- Or apply the Closed Date to all locations
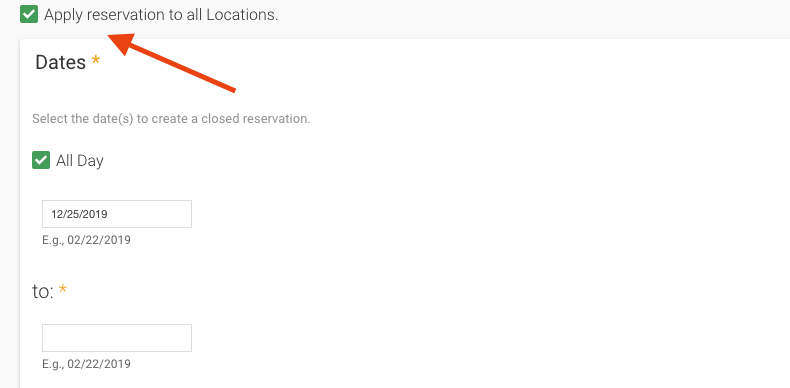
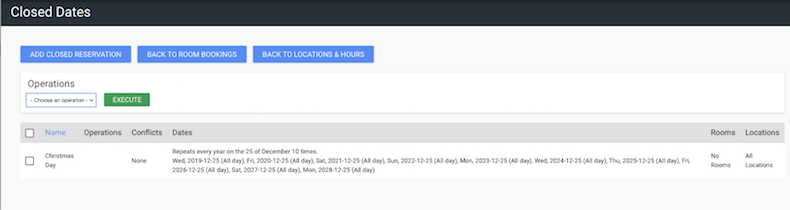
- Choose the date of this Closure and how many times you want this closed date to repeat. For example, we can set 'Christmas Day' as December 25 each year for 10 years.

- Click on 'Save Configuration'
- Now you can view your Closed Dates in the Closed Dates screen
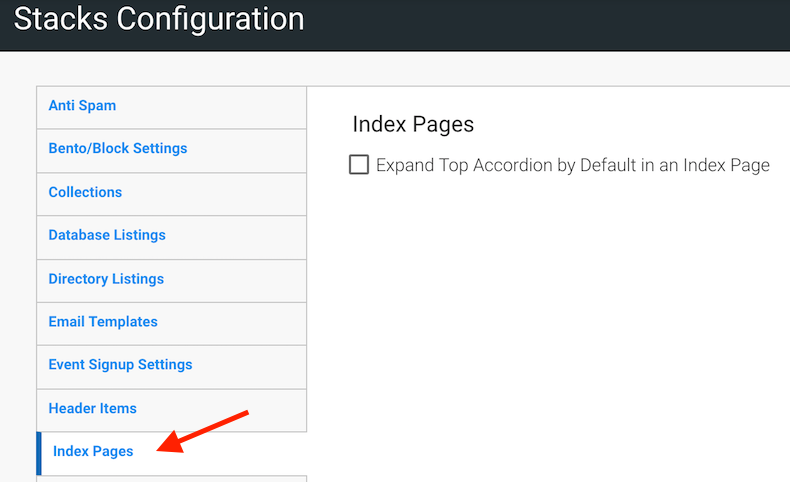
Here you can configure your settings for your Index Pages.
- Click to choose to have the top accordion on your index page expanded by default
- Click 'Save Configuration.'
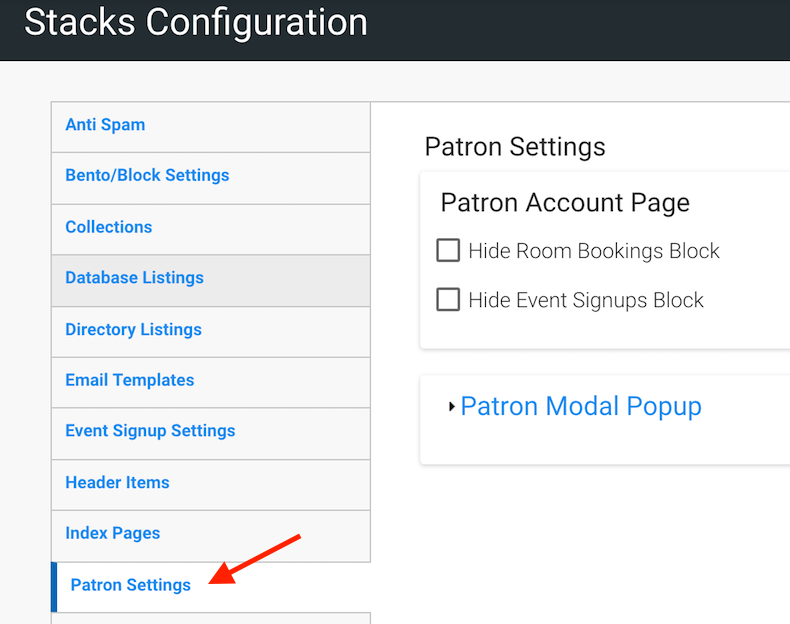
Configure your patron settings here.
- Turn off Events and /or Rooms blocks in the Patron Account (if these are not features that you are currently using on your Stacks Site).
- Click 'Save Configuration'
To Create a Patron Modal:
- Navigate to the Site Configuration Tile (Dashboard > System Configuration > Site Configuration)
- Select the Patrons Settings tab on the left-hand side of the screen
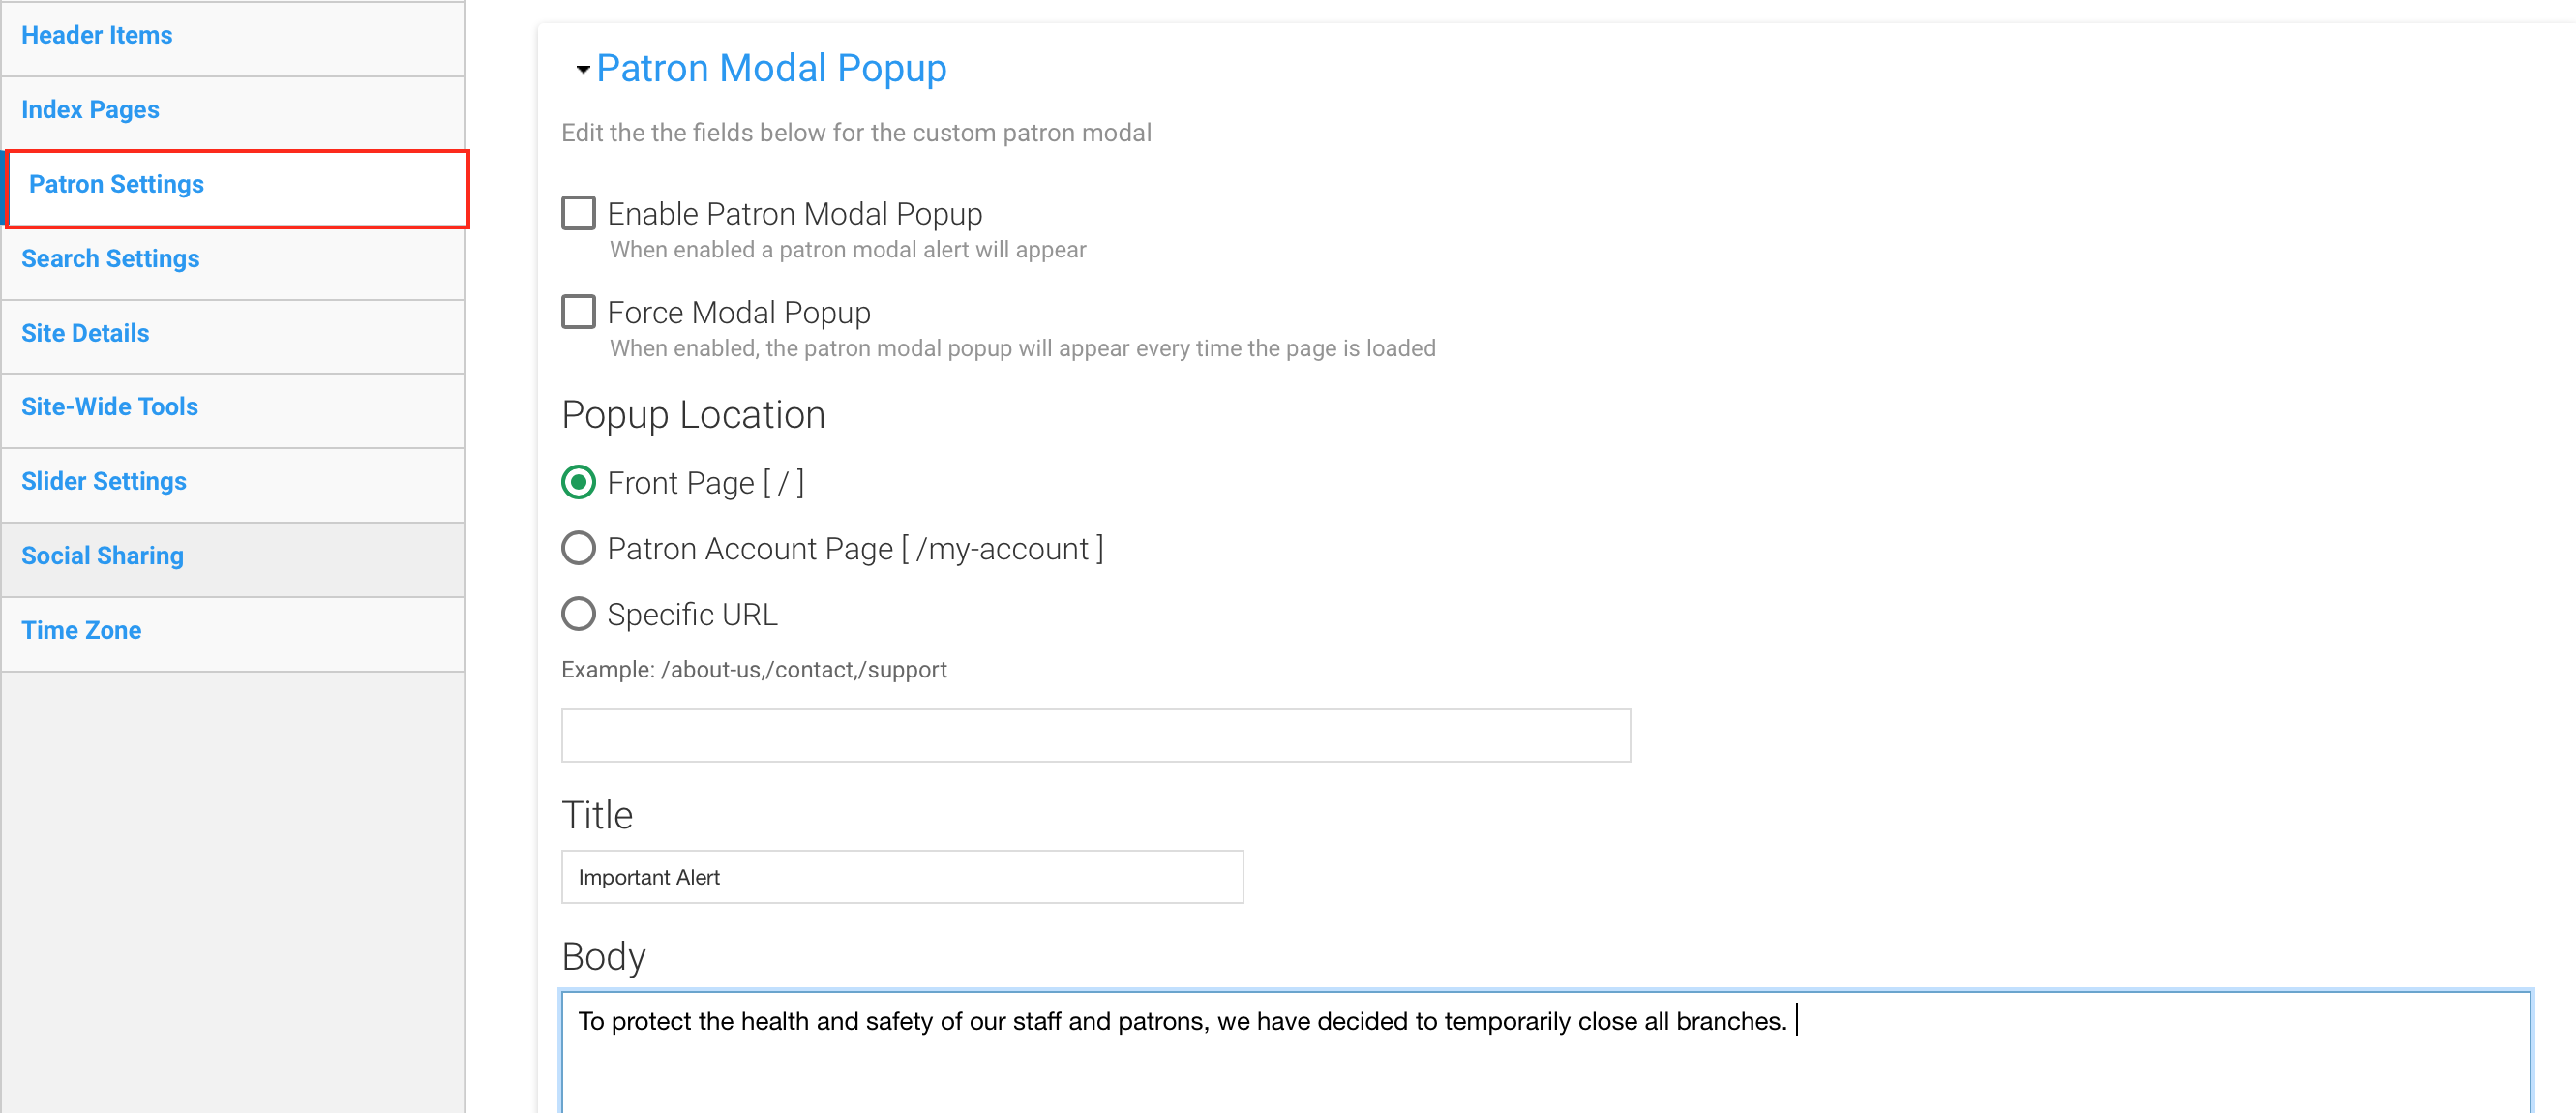
- Add a checkmark for the option "Enable Patron Modal Popup" to display an important message to site visitors.
- Add a checkmark for the option "Force Modal Popup" That will display the alert each time the page is loaded.
- Select the 'Popup Location' choose from the 'Front Page' 'Patron Account Page' or enter a specific URL to any page on your site
- Enter a title in the title field
- Enter your alert text in the 'Body' field
- Click the SAVE CONFIGURATION button to apply changes.
To Disable a Patron Modal
- Remove the checkmark from the option "Enable Patron Modal Popup" to prevent the message from appearing on the site.
- Click the SAVE CONFIGURATION button to apply changes.
From the Search Settings tab on the Site Configuration tile you can perform the following actions:
- Configure Bento Display Settings
- Set Search Result Link Destination
- Configure EDS Display Styles
- Configure Social Sharing Display settings
Configure Bento Display Settings
- Align Images/Icons to the Right
Enabling this option will display icons or images on the Right side of the Bento Box.
- Hide Icons
Enabling this option will hide icons or images that are normally displayed in the Bento Box.
- Hide Bent/Block if there are no results
Enabling this option will hide the Bento Block if there are no results.
Set Search Result Link Destination
Stacks can be configured to direct users to the search results using one of the following methods:
- External OPAC
Users will be redirected to an external OPAC URL to see the detailed results. Currently this option is limited to Sirsi subscribers.
- Internal
Detailed Search results will be displayed within Stacks.
Bento Subtitle Position
You can determine whether to display Subtitles in one of the following locations:
- Above Bento
Subtitles will appear just below the title.
- Bottom of Bento Box
Subtitles will appear at the bottom of the Bento Box.
Bento Styles
There are a number of options that allow you to determine the look and feel of the Bento Search results. This section allows you to configure the following components:
-
Change buttons into links
Enabling this will change the style of the buttons into links.
-
Display Sorting Options
Enable to show the Sort By option in the EDS List view.
-
Hide Authors in EDS List View and Bento
When checked, the Authors will not be shown in a search result.
- Hide Source in EDS list view and Bento
When this option is enabled, the source will not be shown in search results.
-
Hide Subjects in EDS List View
When checked, Subjects will not be shown in search results.
-
Display Abstract in EDS list view and Bento
When this option is enabled, the Abstract will be shown in search results.
-
Hide FullText in EDS Details Page
When checked, FullText will not be shown in an EDS details page.
EDS Styles
Configure the options that will allow you to determine the look and feel of EDS Search Results. This section allows you to configure the following components:
- Change buttons into links
Enabling this will change the style of the buttons into links.
- Enter the name of the organization, which will appear in the header, in the ‘Site name’ field
- Enter the website slogan in ‘Slogan’ field
- If no slogan is entered, the space will be left empty
- The use of the slogan is dependent on the site’s theme
- Enter the email address from which automated emails should be sent from your Stacks site
- To prevent emails sent from this address from being flagged as spam by the recipient, use an address ending with your site’s domain (ex. @yourorganization.com)
- Enter an 'Access Denied' message that should appear when a user lands on a page they do not have permission to see
- Enter a 'Page Not Found' message that should appear when attempts to access a page that does not exist in the site
- Enter a 'Result Not Found' message that should appear when a user executes a search that returns no results
Password Protection
-
Click the 'Enabled' checkbox to turn site-wide password protection on or off
-
If site-wide password protection is enabled, users must be signed in to access any and all pages. This can be helpful during the initial setup up phase, or for organizations whose Stacks website is not intended for public viewing.

- Note: You can specify whether the initial login displayed accepts "Patron" login credentials instead of "Administrator/Staff" credentials. Using the "Set Patron login form as default" checkbox. As well as redirect the staff or patron user to the homepage on login. By default, the Patron is taken to "My Account" and Staff are sent to the Stacks Dashboard.
Patron Logout Redirection
If you want your patrons to be directed to a specific page on logging out of their 'My Account' page, you can specify the URL of the redirect page here.
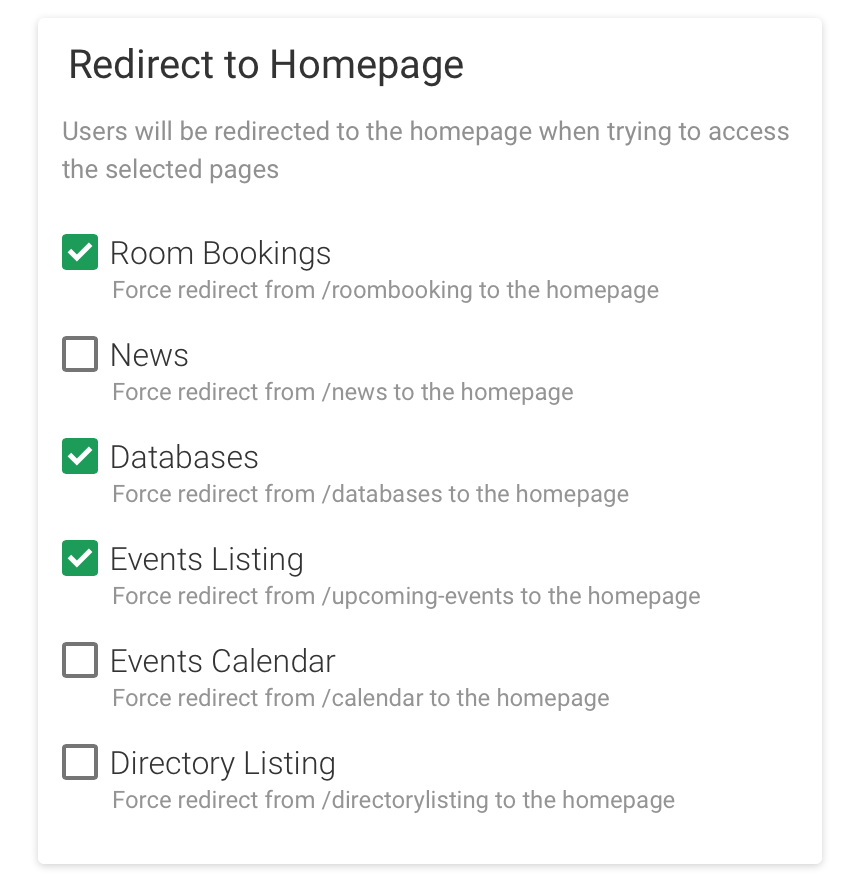
Redirect to Homepage
You can redirect users to the homepage from the following built-in feature specific pages
- Room Bookings: /roombooking
- News Articles: /news
- Database Listings: /databases
- Events Listings: /upcoming-events
- Events Calendars: /calendar
- Directory Listings: /directorylistings
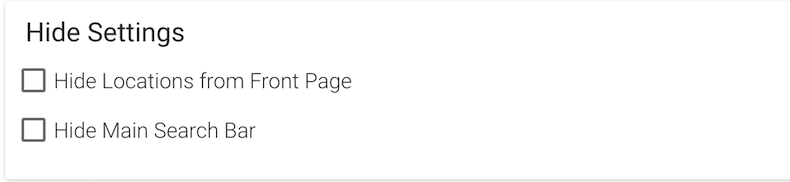
Hide Settings
Here you can choose to hide the location bar from your home page and /or the search bar from your site.
Choose the Language of the Dashboard
Choose a language for your tile in your dashboard. The default language is English.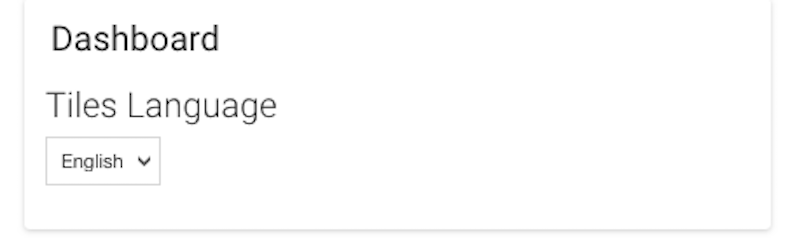
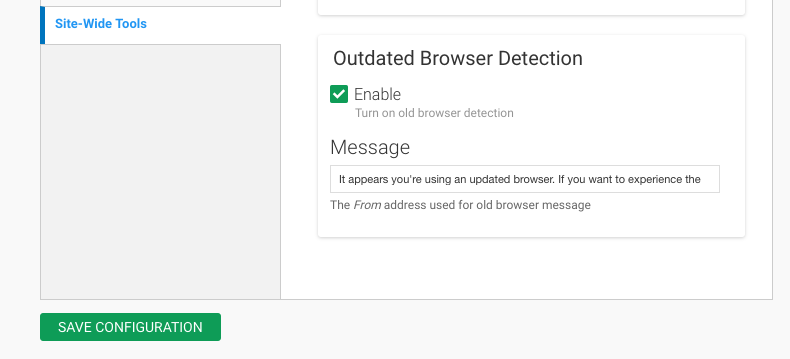
Outdated Browser Detection
-
Click the 'Enabled' checkbox to turn 'Outdated Browser Detection' on or off
-
Your users' Stacks experience may not be optimal if the browser they are using is not up to date. Enabling this feature will warn users when their browser version might affect functionality.
- Optional Add a custom message to alert users that their browser is out of date
- Click 'SAVE CONFIGURATION'
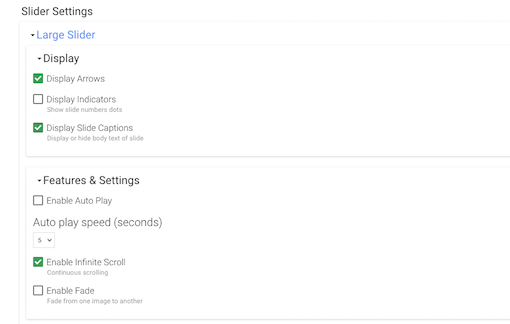
You have options to customize your sliders by toggling these options on/off:
- Arrows - Allow the user to manually scroll to the next slide by clicking on an arrow
- Indicators - Show dots under the slider to indicate how many slides there are and which one the user is currently viewing
- Slide Captions - Display or hide the body text of the slide
- Auto Play - Set the time for each slide to display in seconds
- Infinite Scroll - Continuous scroll from the first slide to the last slide, and repeat
- Fade - Instead of sliding from one slide to another, slides will fade from one image to another image
- Center Mode - The center image (slide) in the row of slides will appear larger so the center of the mini slider is emphasized
To access these options, Navigate to your Dashboard and select the 'System Configuration' tile.
- Open the 'System Configuration' tile
- Select the 'Site Configuration' tile
- Select the tab on the left side of the screen called 'Slider Settings'
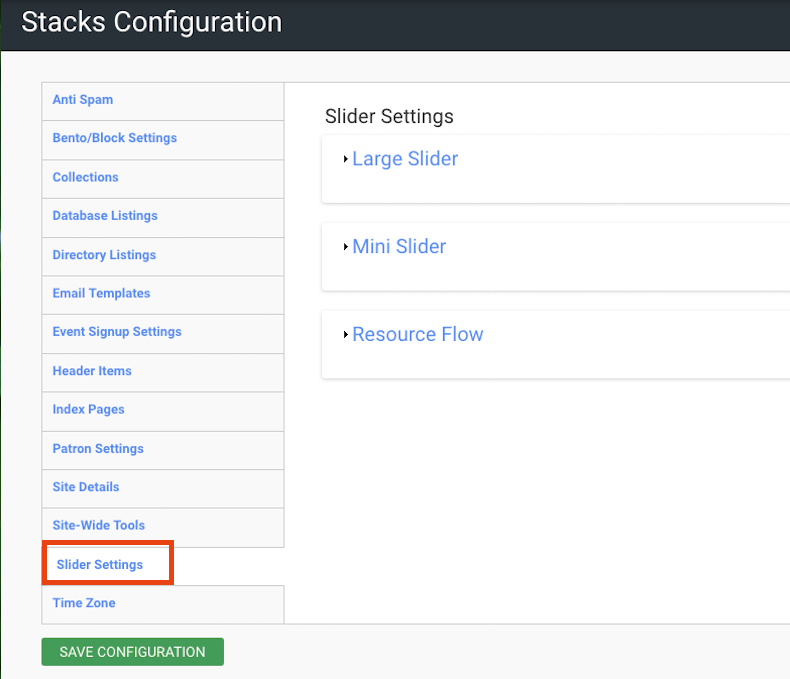
- Click on the 'Large Slider' tab to open the tab and view the options
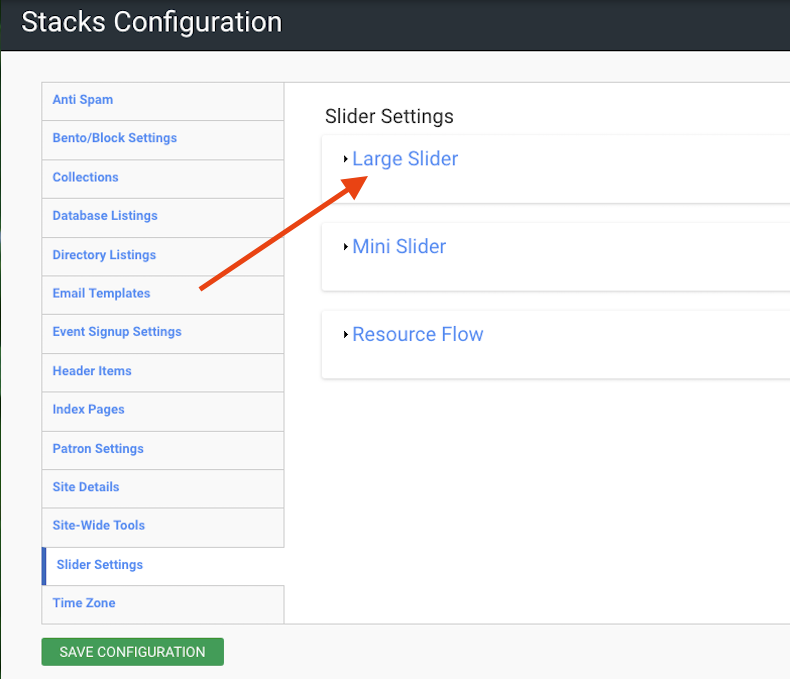
- Click on the boxes to toggle on the features you want to enable
- Note: The options that you choose here will apply to all of the sliders that you create on your site
Social Sharing icons allow users to share content through several different methods by clicking on the corresponding icon. You can configure Stacks to display or hide social sharing icons for the following search types and content elements:
- EDS Search
- Polaris Search
- Sirsi Search
- Database Listings
- Easy Forms
- Events
- Pages
- Reserves
- News Articles
To Display or Hide the Social Sharing Icons:
- Navigate to the Site Configuration Tile (Dashboard > System Configuration > Site Configuration).
- Open the Social Sharing tab.
- For each Search or Content type, Add a checkmark for each option that you would like to enable the social sharing icon for; or
- remove the checkmark for any option you do not want to display the social sharing icon for.
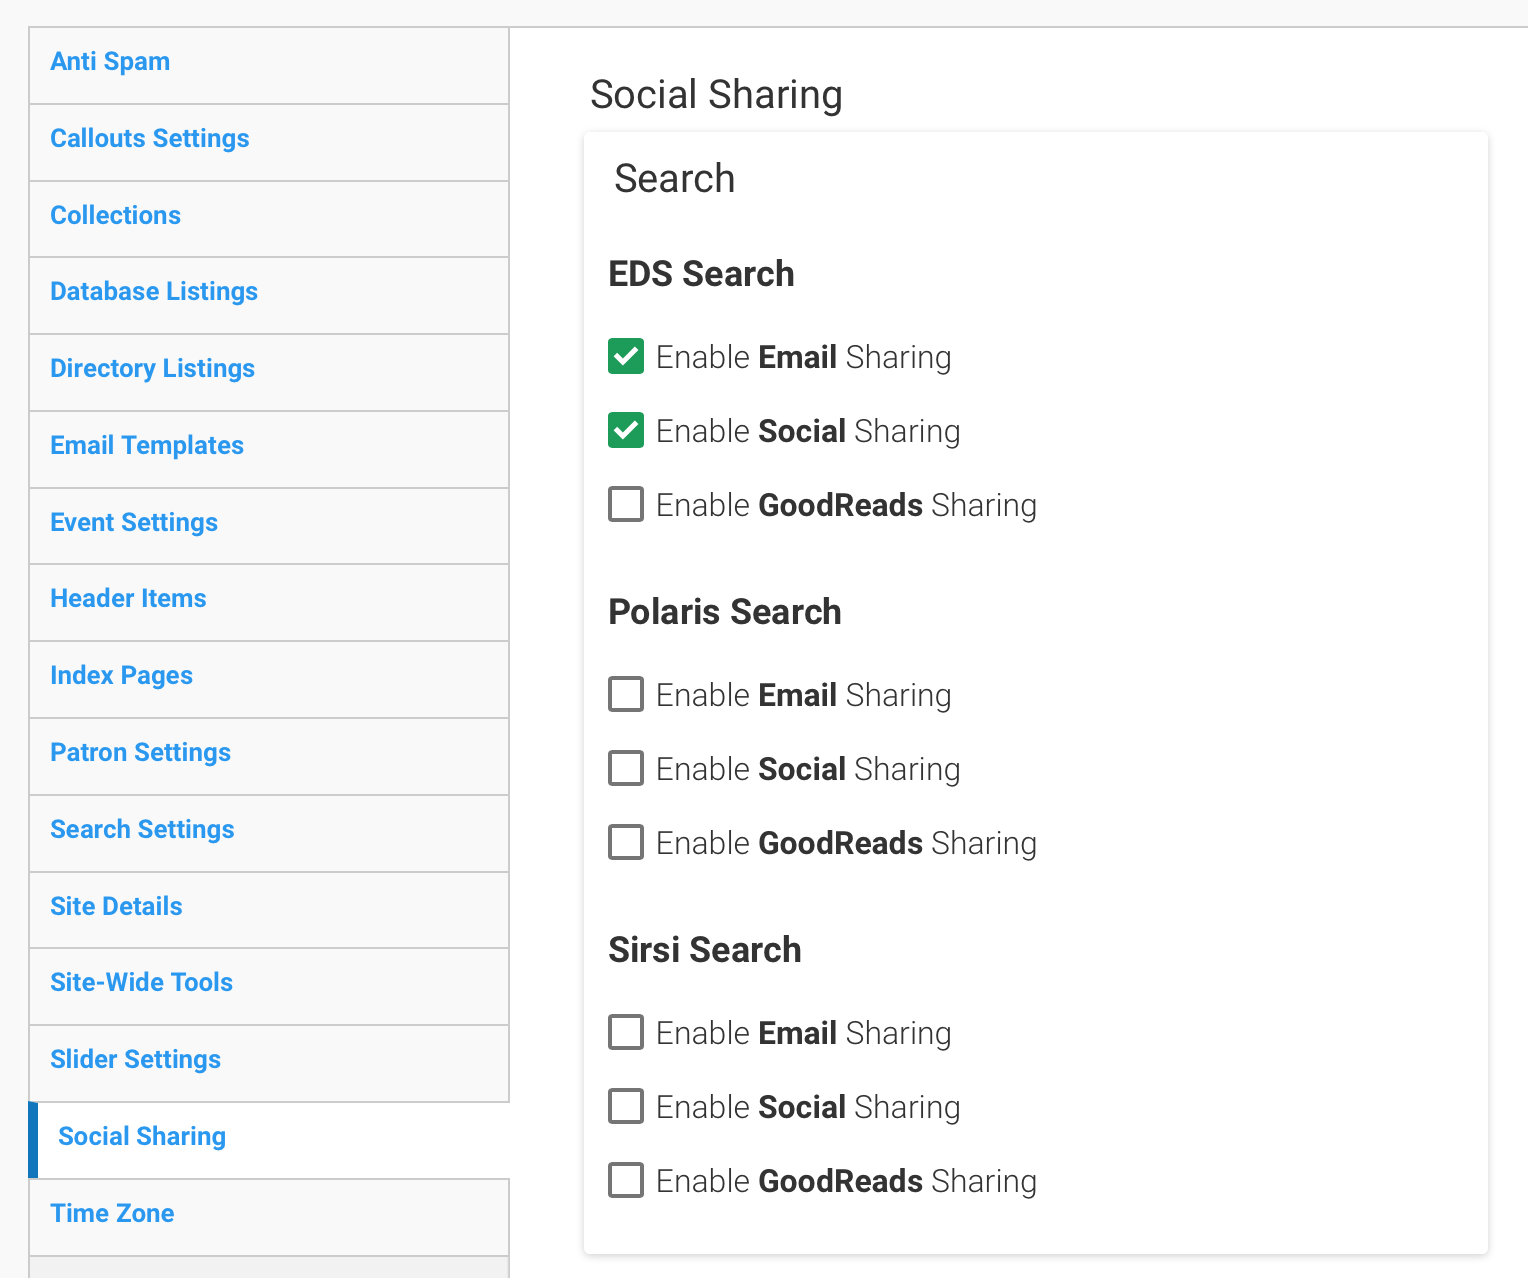
- Click the SAVE CONFIGURATION button to apply changes.
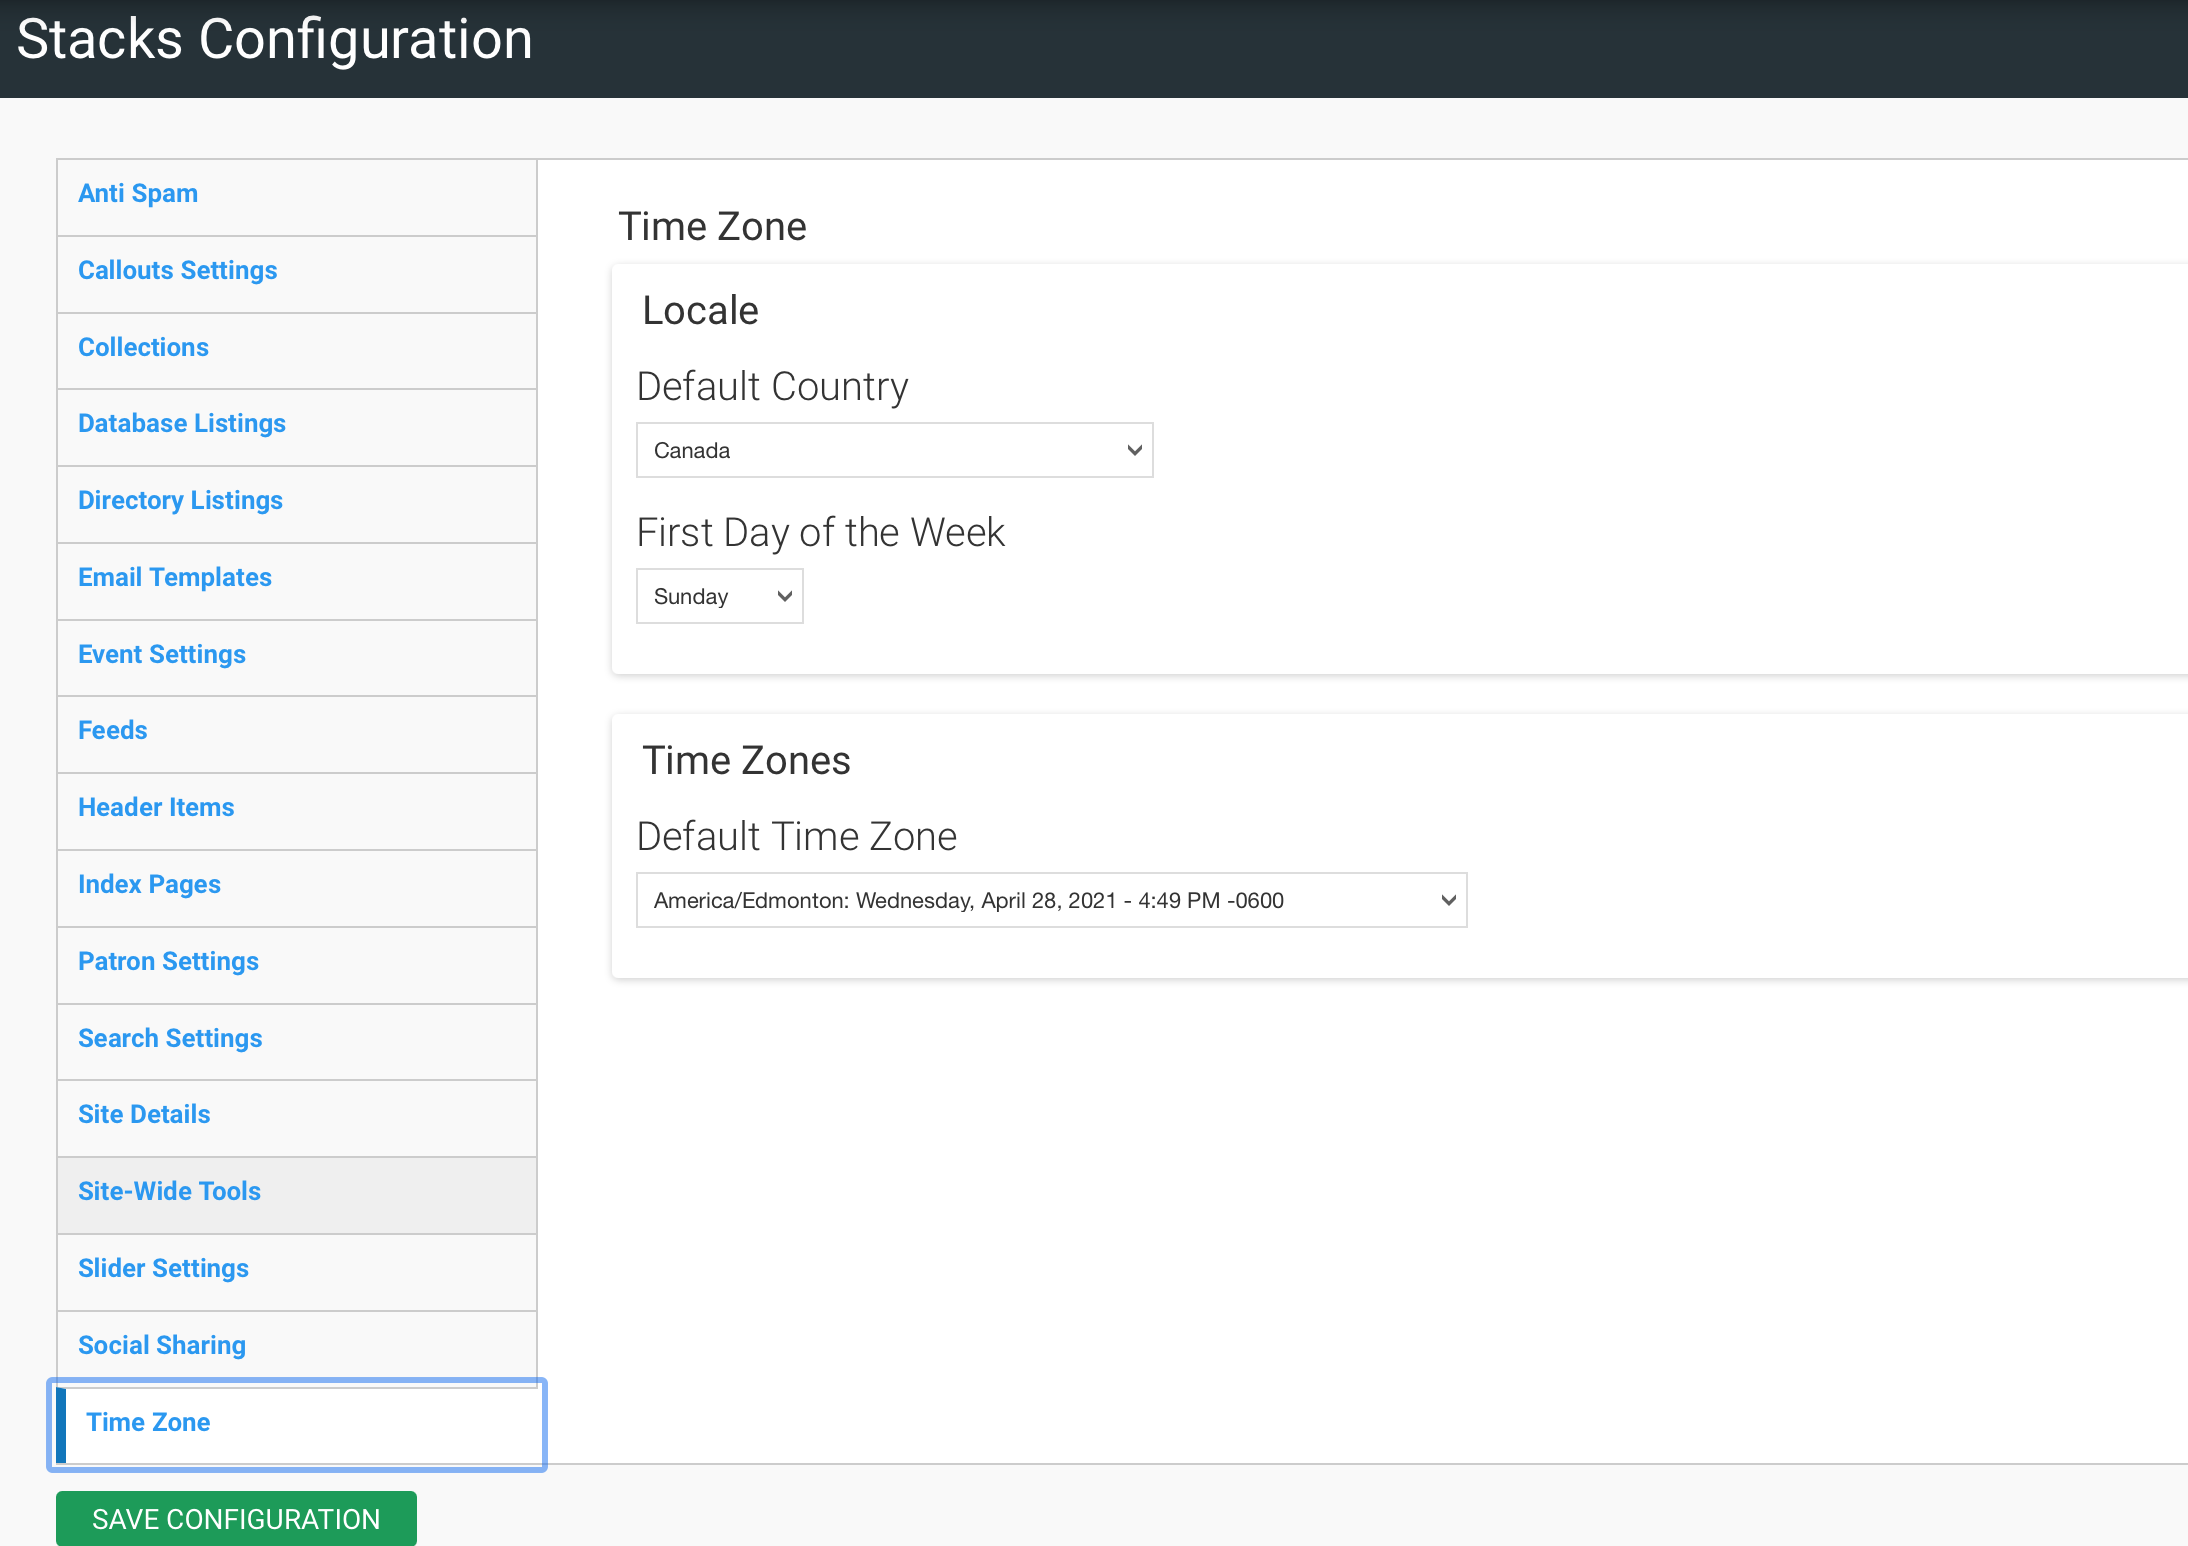
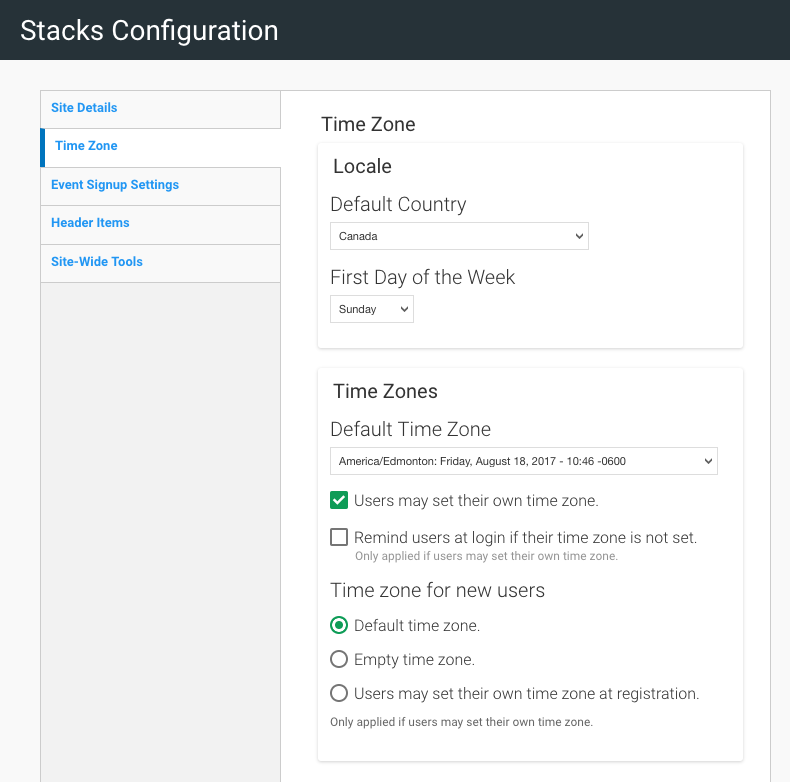
1. Set the Default Country
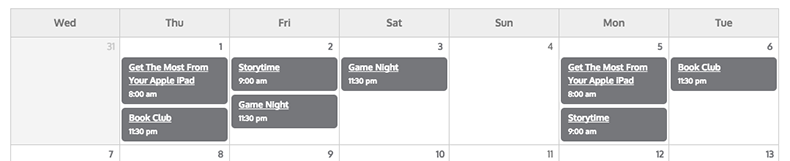
2. Choose the First Day of the Week.
- This will configure the site calendar accordingly
For Example: If we set Wednesday as the 'First day of the week', the calendar will appear as below:
3. Set the Default Time Zone for the site
-
The time zone may affect Room Bookings, the Calendar, and Events among other features. It is important that this is set appropriately.